# Time-Based Automation Time-based automation enables you to automate any function in an existing smart contract that is externally callable. For this exercise, we will deploy a contract on Ethereum Sepolia. The contract will be a basic counter contract with one function: `count`. We will then use Automation to call `count` every 5 minutes. ## Prerequisites - [Testnet Sepolia funds](https://faucets.chain.link/) - [Testnet LINK on Sepolia](https://faucets.chain.link/) ## Creating a Counter Contract 1. Open [Remix](http://remix.ethereum.org) and create a new workspace by clicking the burger icon and then **Create blank workspace**. Name the workspace "Automation" and click **Ok**: 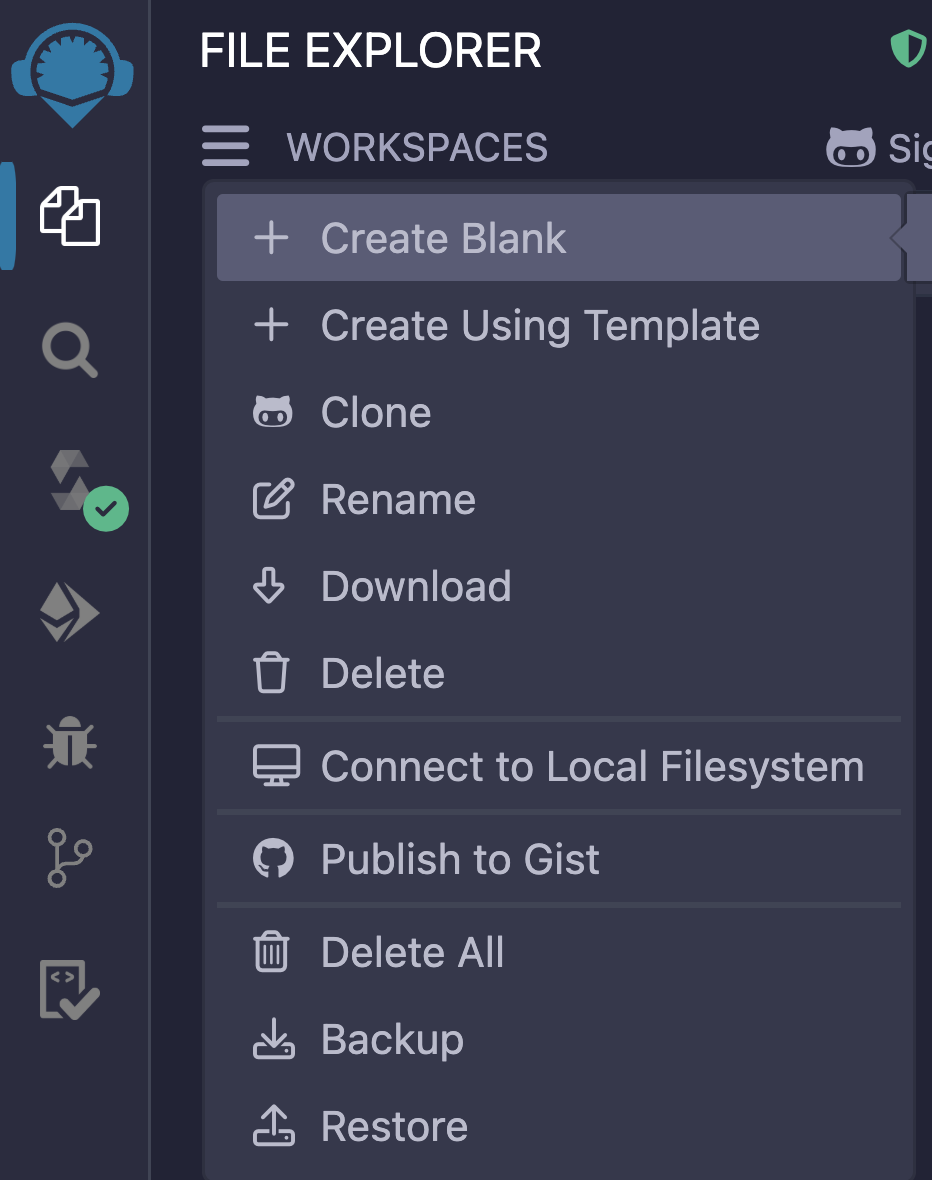 2. Create a folder called `contracts` by clicking the **Create folder** button: 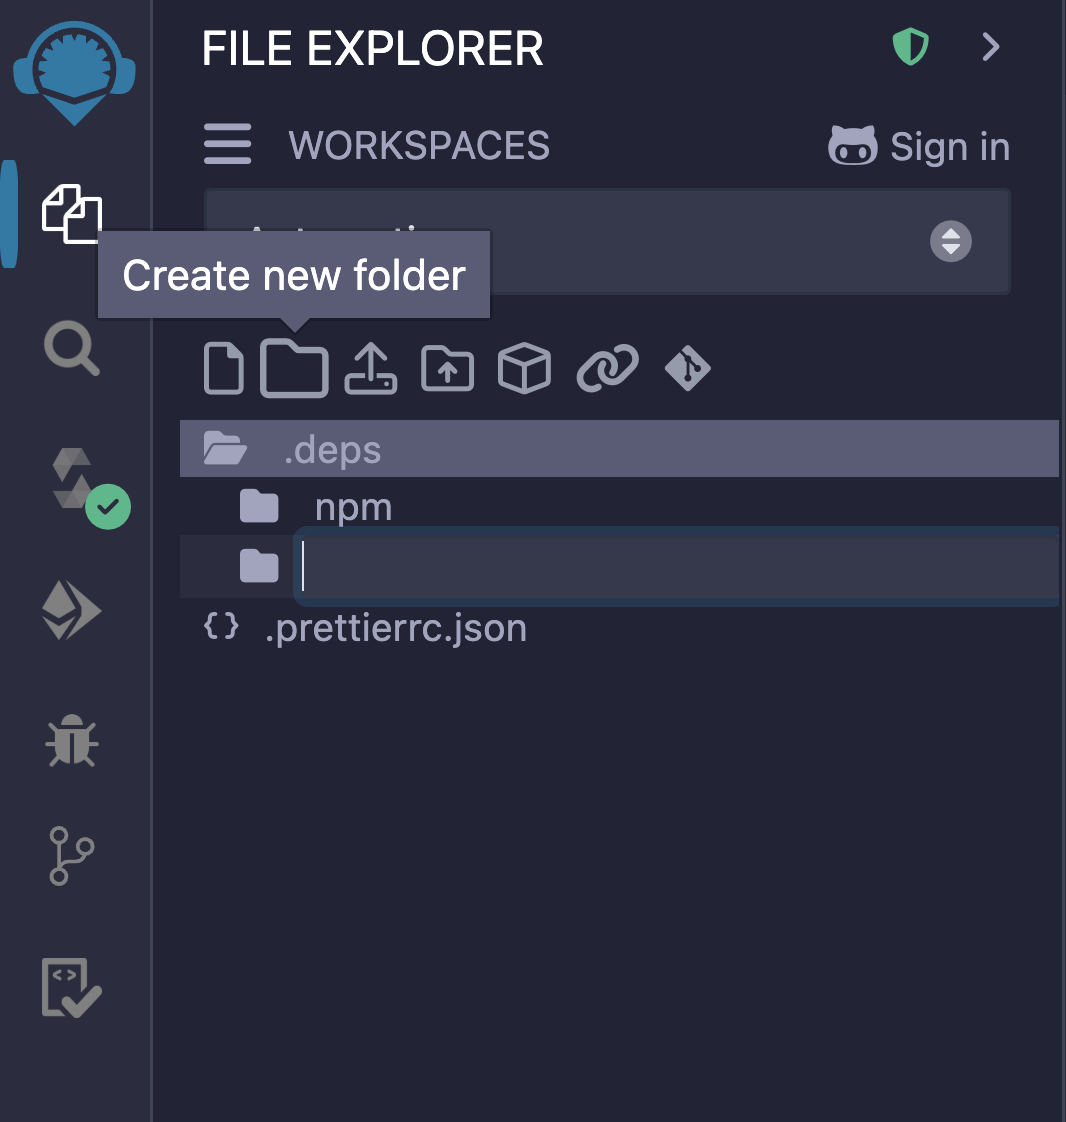 3. Open the `contracts` folder by clicking on it and then create a file called `TimeBased.sol` by clicking on the **Create file** button: 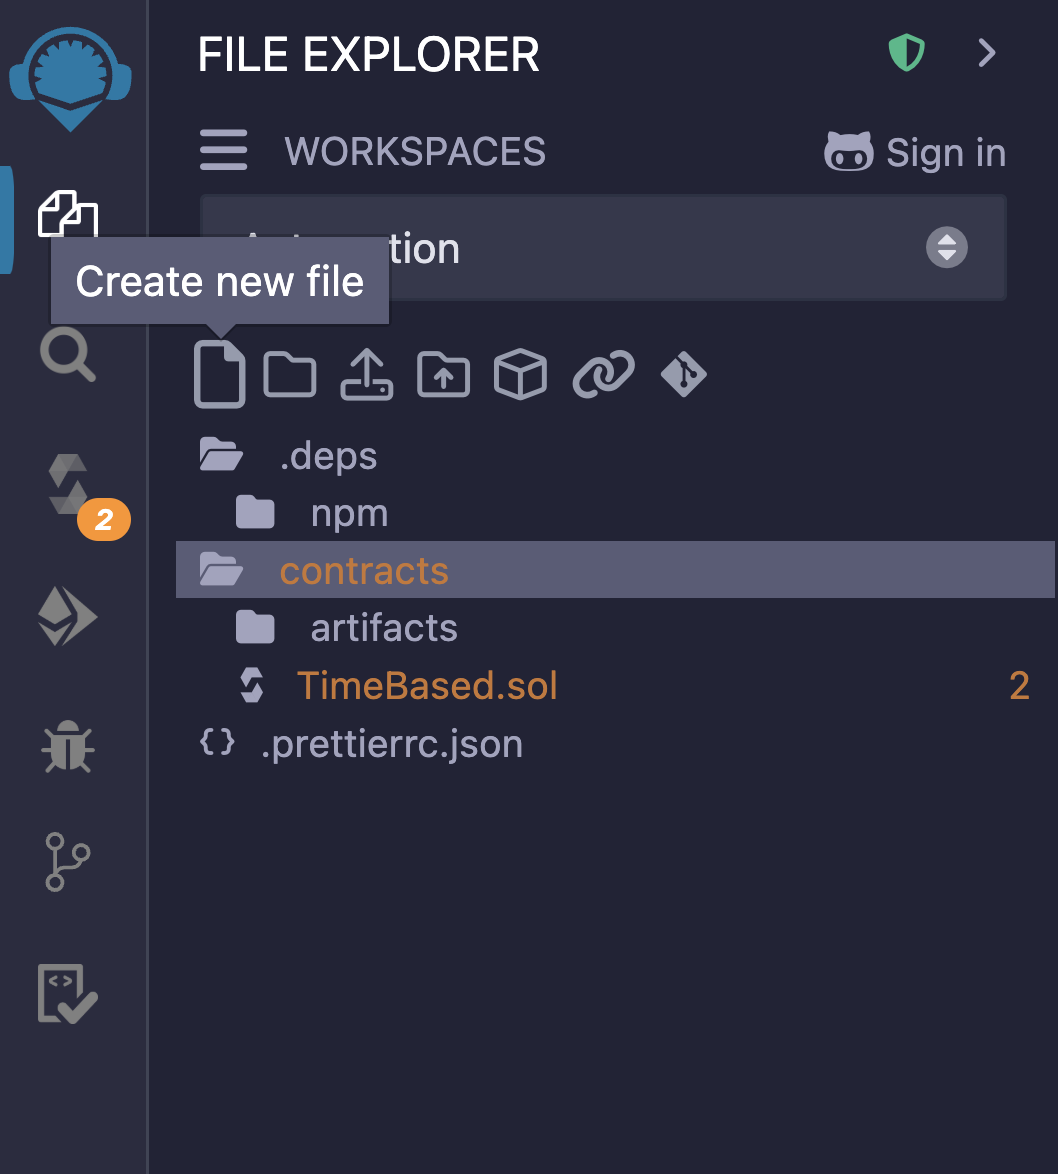 4. Paste the following code from the [course code repo](https://github.com/ciaranightingale/chainlink-fundamentals-code/blob/main/automation/TimeBased.sol) into the `TimeBased.sol` file. This simple smart contract stores a `counter` state variable (initially with the default value of `0`) that is incremented when `count` is called. **Tip**: `counter ++` is equivalent to writing `counter = counter + 1`. It's a fun little Solidity shortcut - neat right! ## Deloying the TimeBased contract Let's deploy this contract to Sepolia. - Head to the **Solidity compiler** tab and click **Compile TimeBased.sol** to compile your contract. 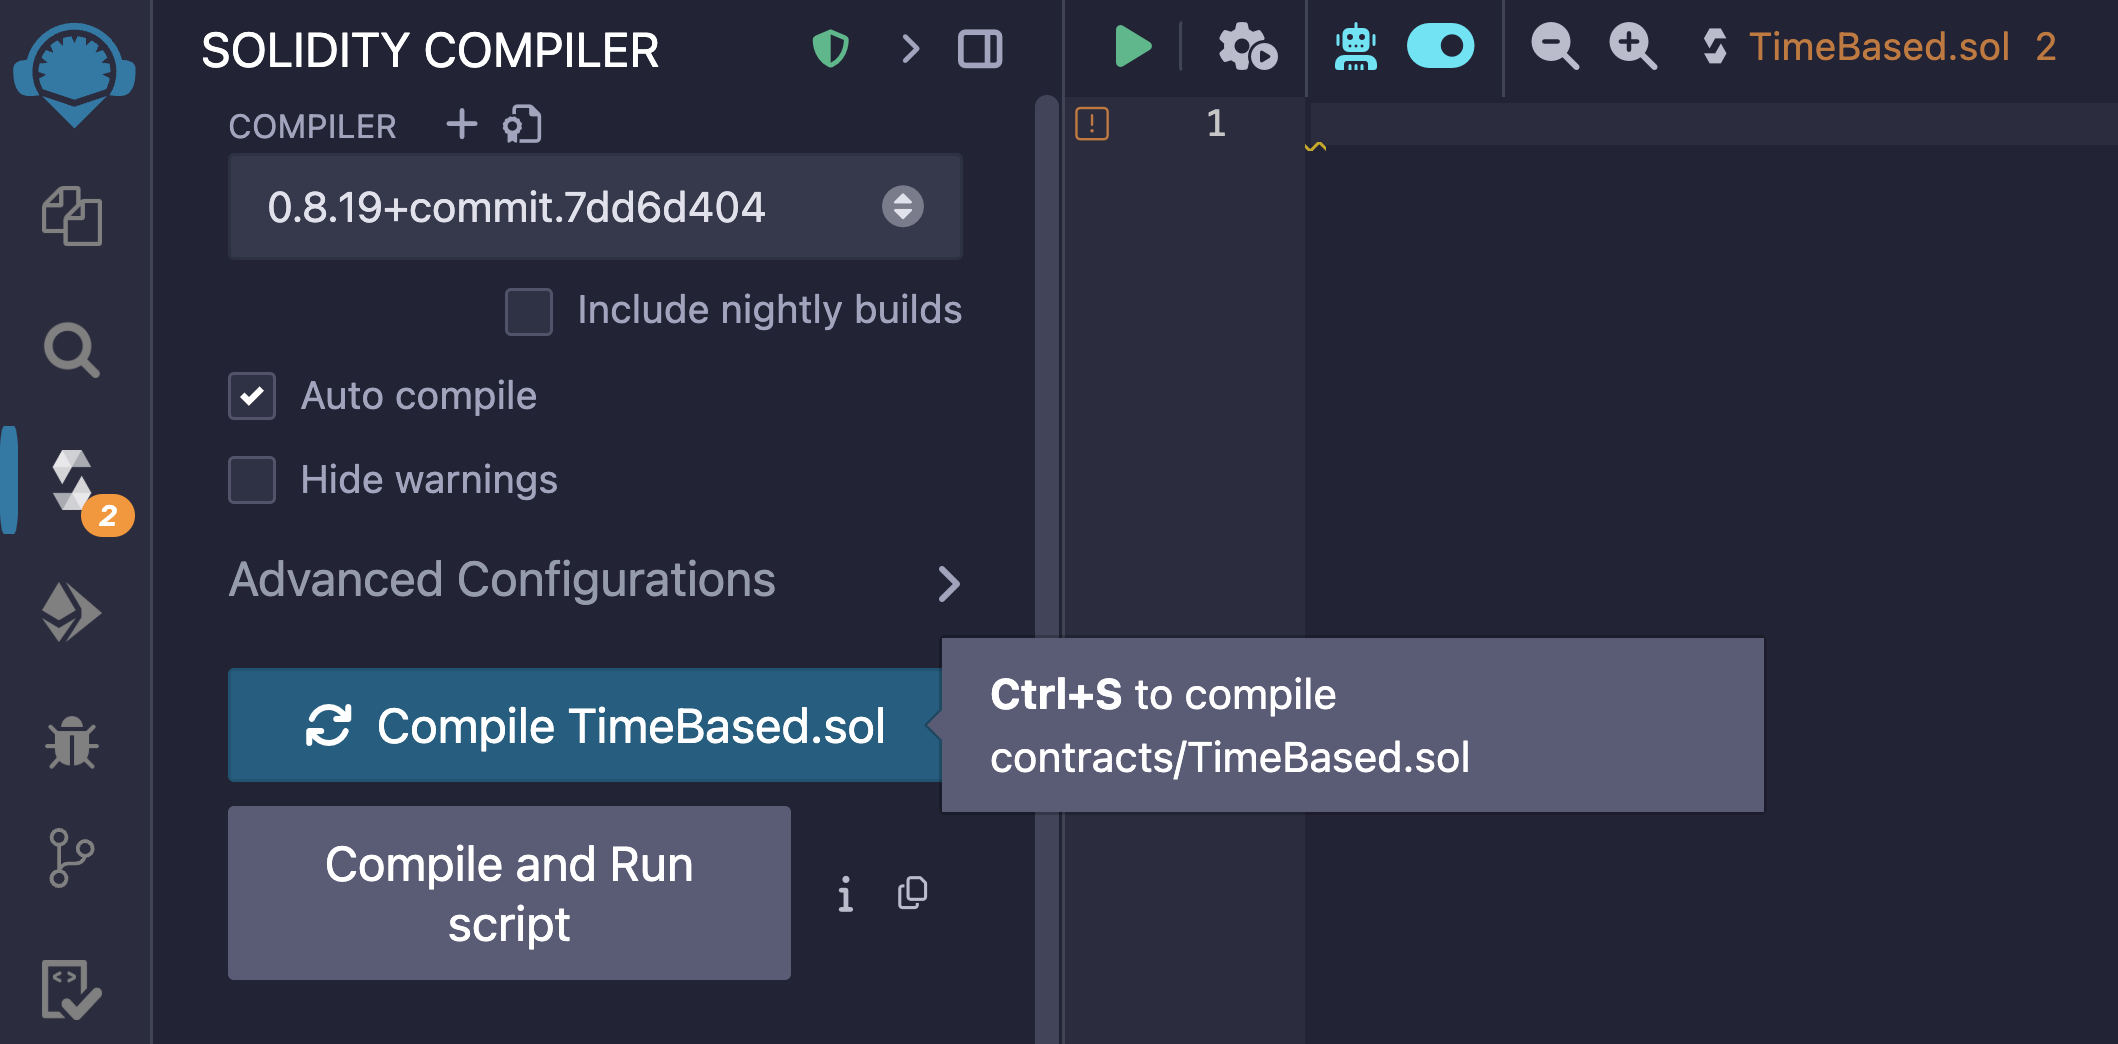 - Head to the **Deploy & run transactions** tab and select **Injected Provider - MetaMask** for the **Environment** to connect MetaMask to Remix. 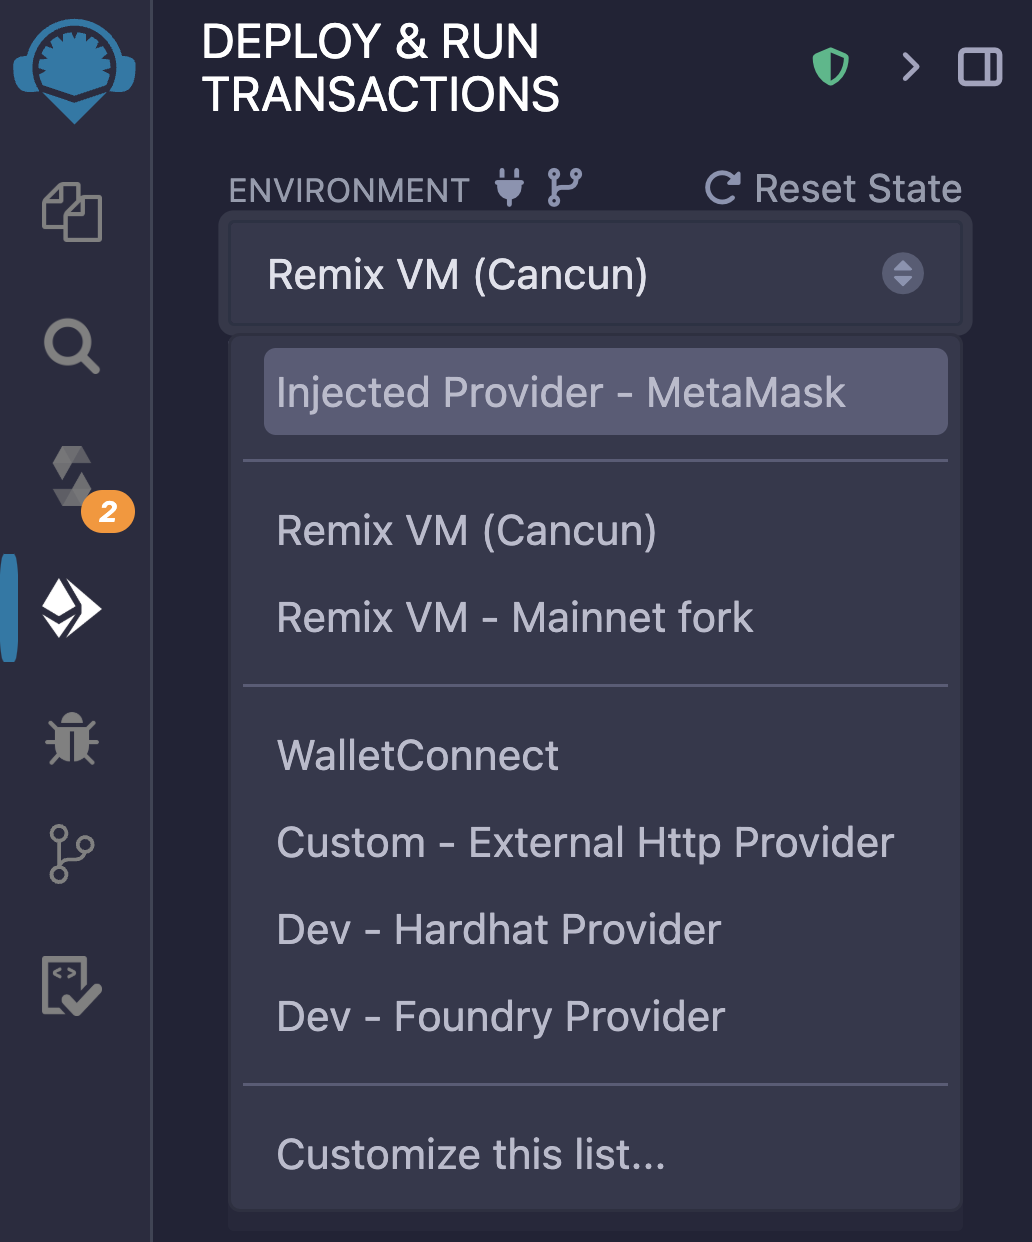 - Open MetaMask and check you are still connected to Sepolia by clicking the top left-hand network selector button. - Click **Deploy** to deploy the `TimeBased` contract. This will trigger MetaMask to pop up. Click **Confirm** to sign the transaction to deploy the contract. 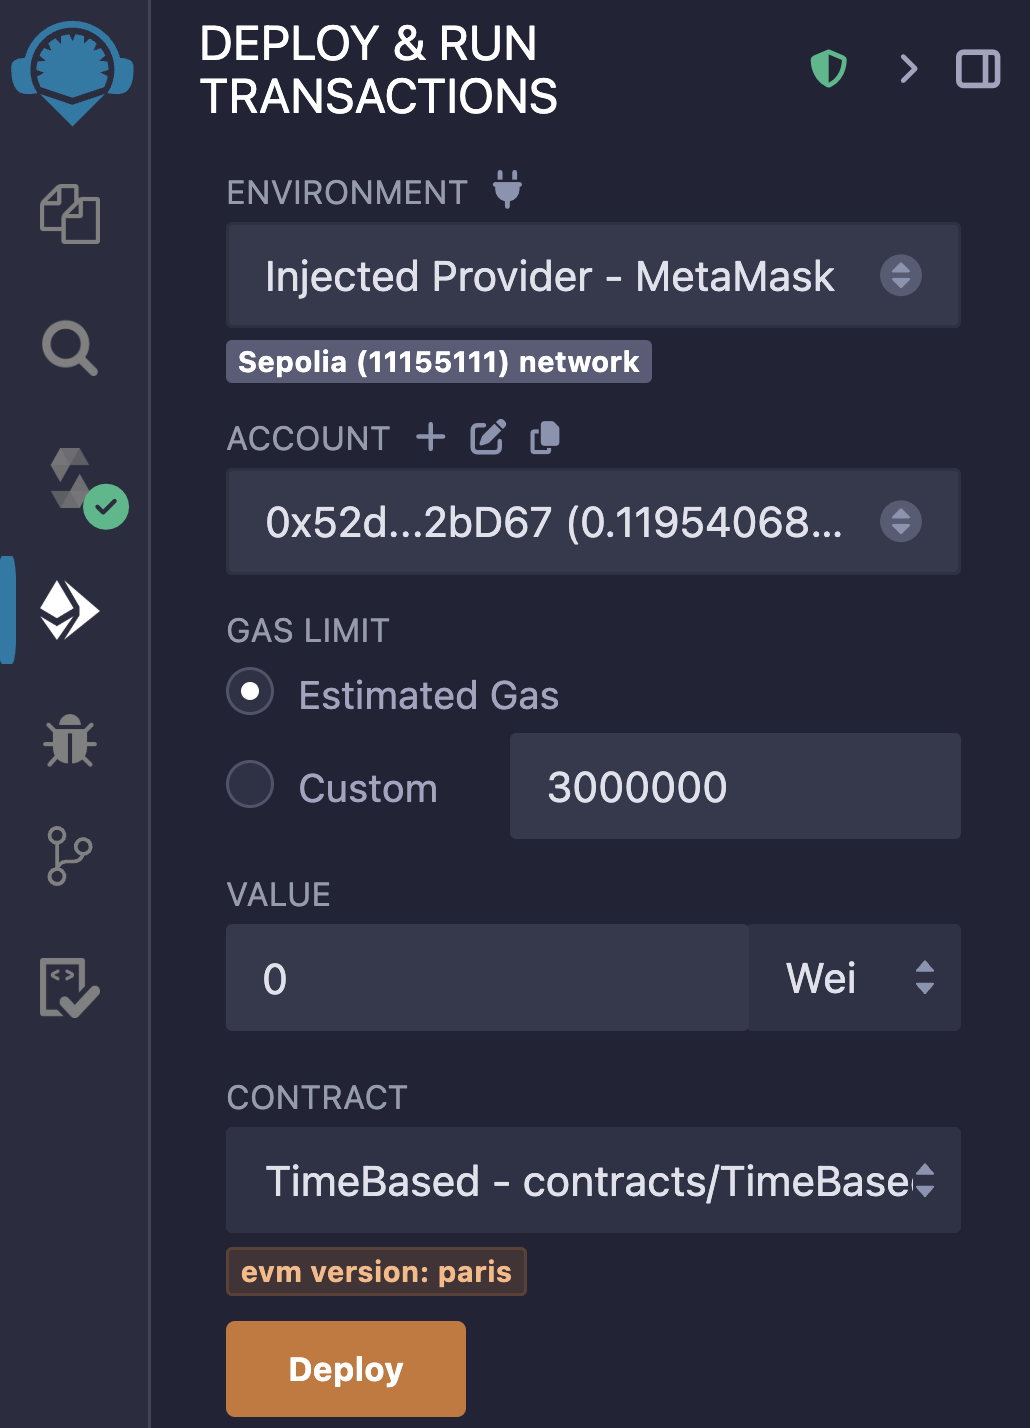 You will know if your contract has been successfully deployed if: - The Remix terminal window (the block at the bottom of your screen) shows a green tick next to the transaction information:  - Your MetaMask shows a successful contract deployment transaction: 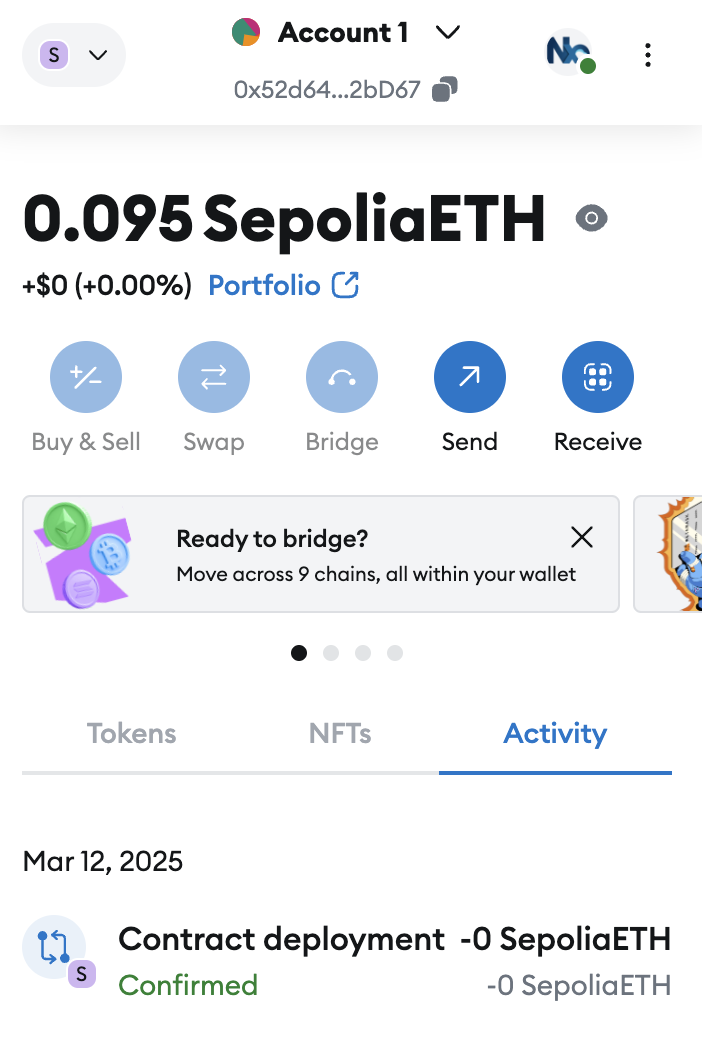 - And your contract is in the **Deployed contracts** section: 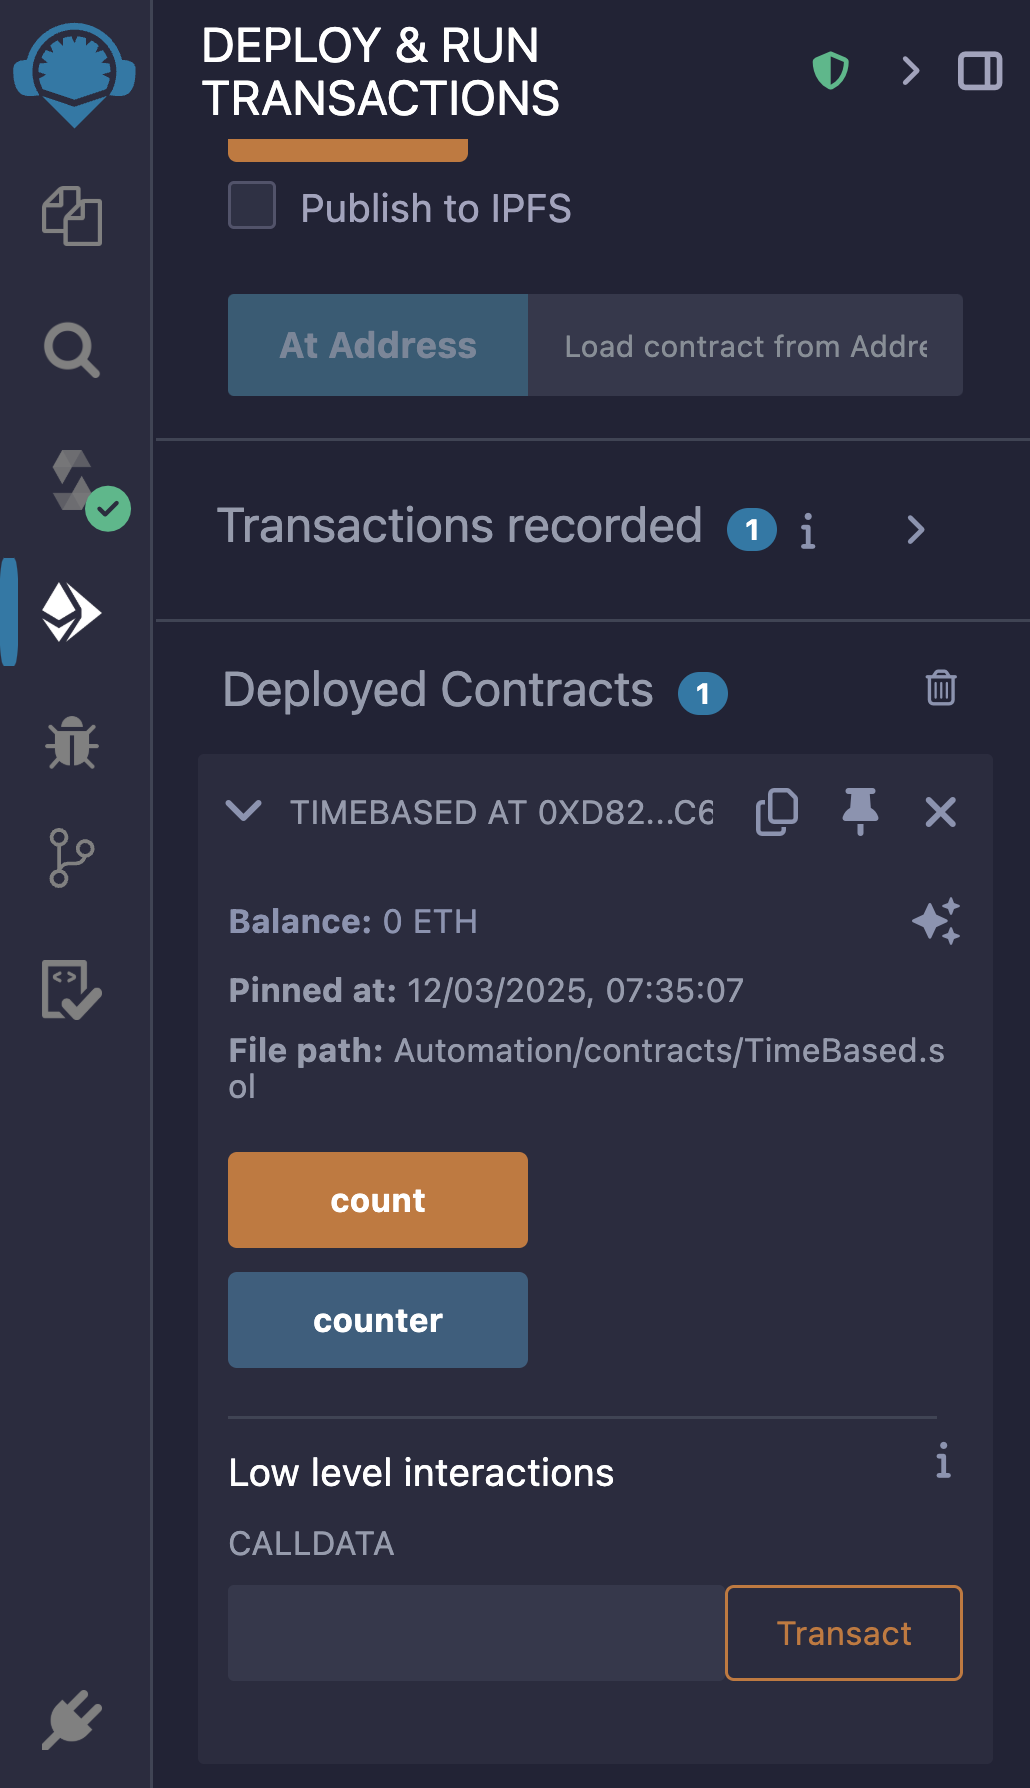 - Click the pin icon to the workspace to pin the `TimeBased` smart contract. This will ensure that the contract instance persists in your workspace when Remix is reloaded. - Finally, copy the `TimeBased` contract address by clicking the copy button next to the pin. **Note**: From this point forward, I will assume you are comfortable with the following actions in Remix: - Creating new workspaces, folders, and files. - Compiling smart contracts. - Connecting MetaMask to Remix. - Deploying smart contracts. - Pinning smart contracts to a workspace. This is to avoid repetition. If you need a reminder, please review the Remix walk-through in Section 2. ## Verify the smart contract Verification allows block explorers and other services, such as Chainlink Automation, to access the contract's ABI and, therefore, its functions. In order for Automation to be able to call `count,` we need to first verify our smart contract. Let’s verify our contract on [Etherscan](https://sepolia.etherscan.io/). 1. Head to the [Etherscan website](https://sepolia.etherscan.io/). 2. Search for the `TimeBased` contract address, then head to the **Contract** tab and click **Verify and Publish**. 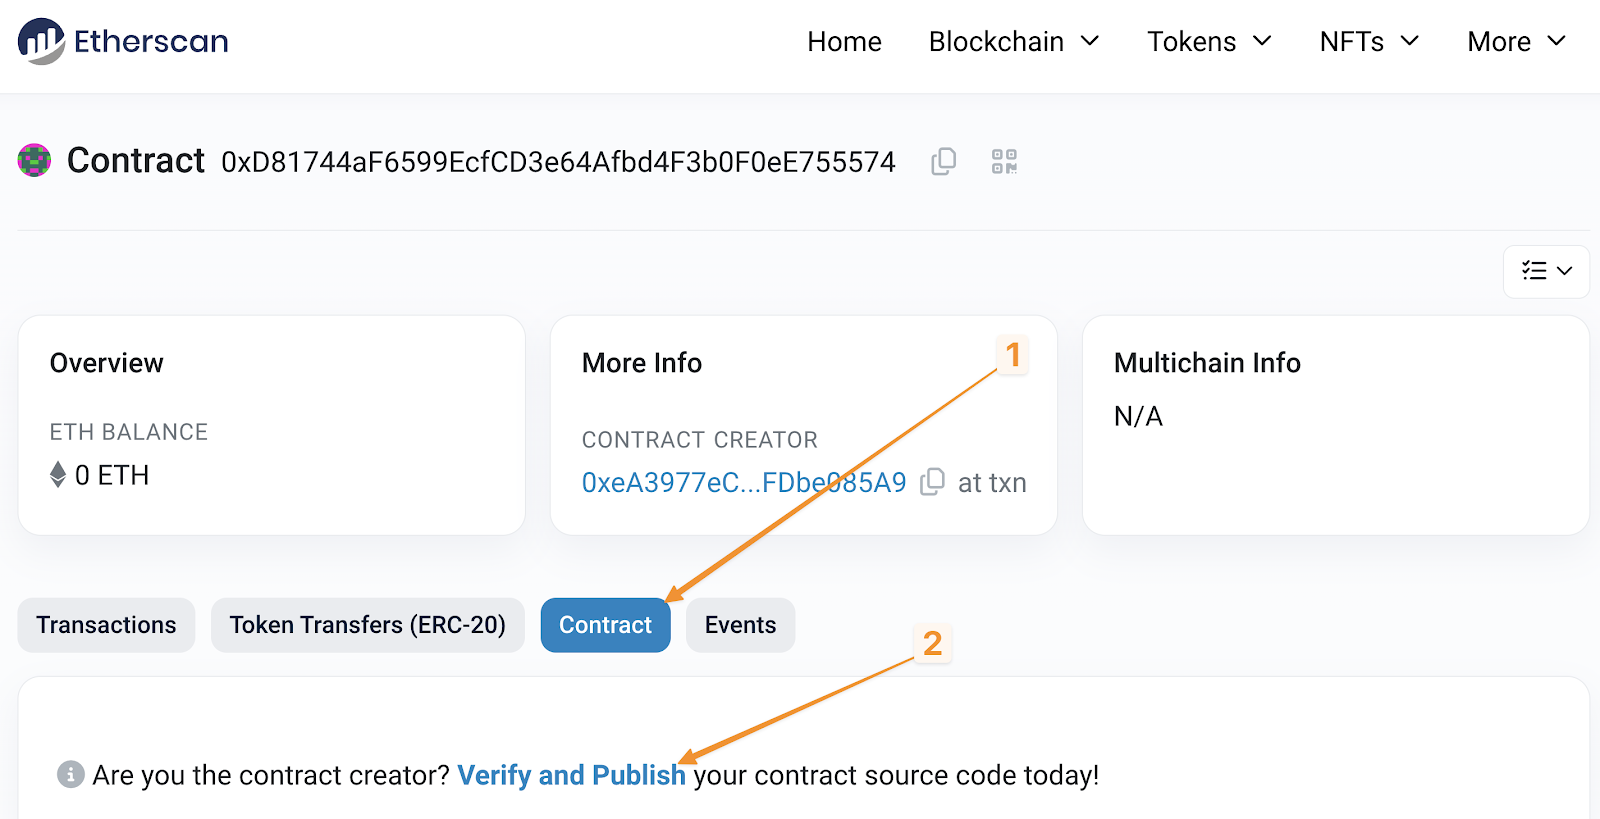 3. Fill in the values for your contract. The compiler version can be found on the **Solidity compiler** tab in Remix. Click **Continue**. 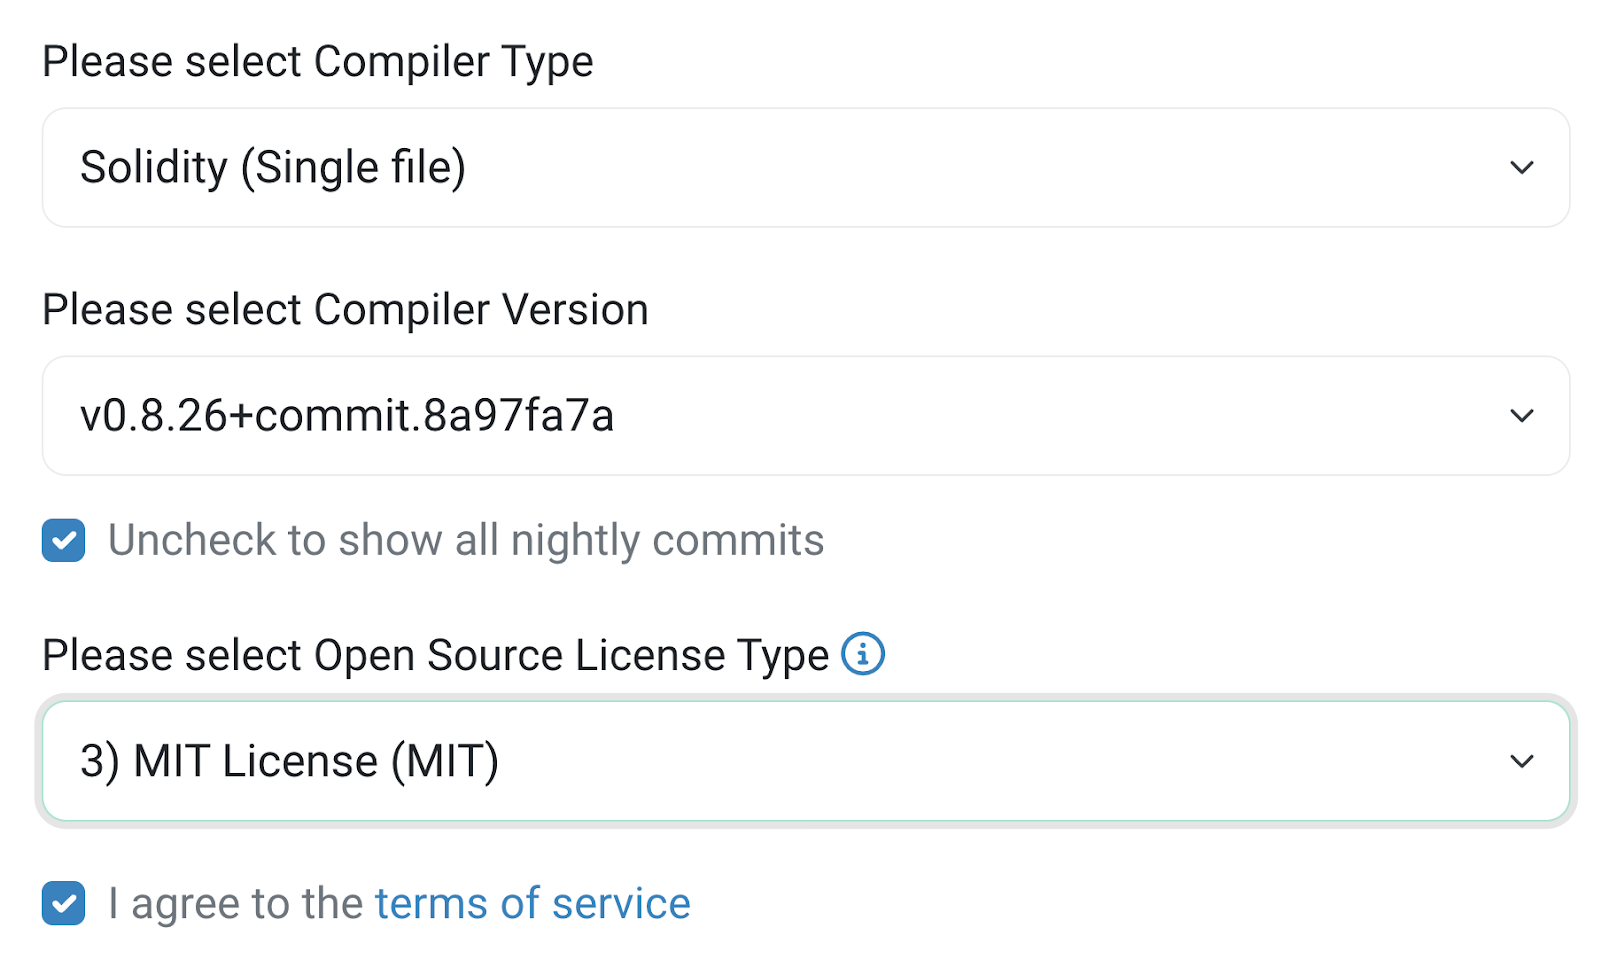 3. On the next screen, paste in the code for the contract and leave the rest of the options default/blank. Click **Verify and Publish**. When you return to the contract on Etherscan, you should now see a green checkmark next to the **Contract** tab. Now, you can view the source code on Etherscan and easily interact with the contract from the **Read contract** and **Write contract** tabs. 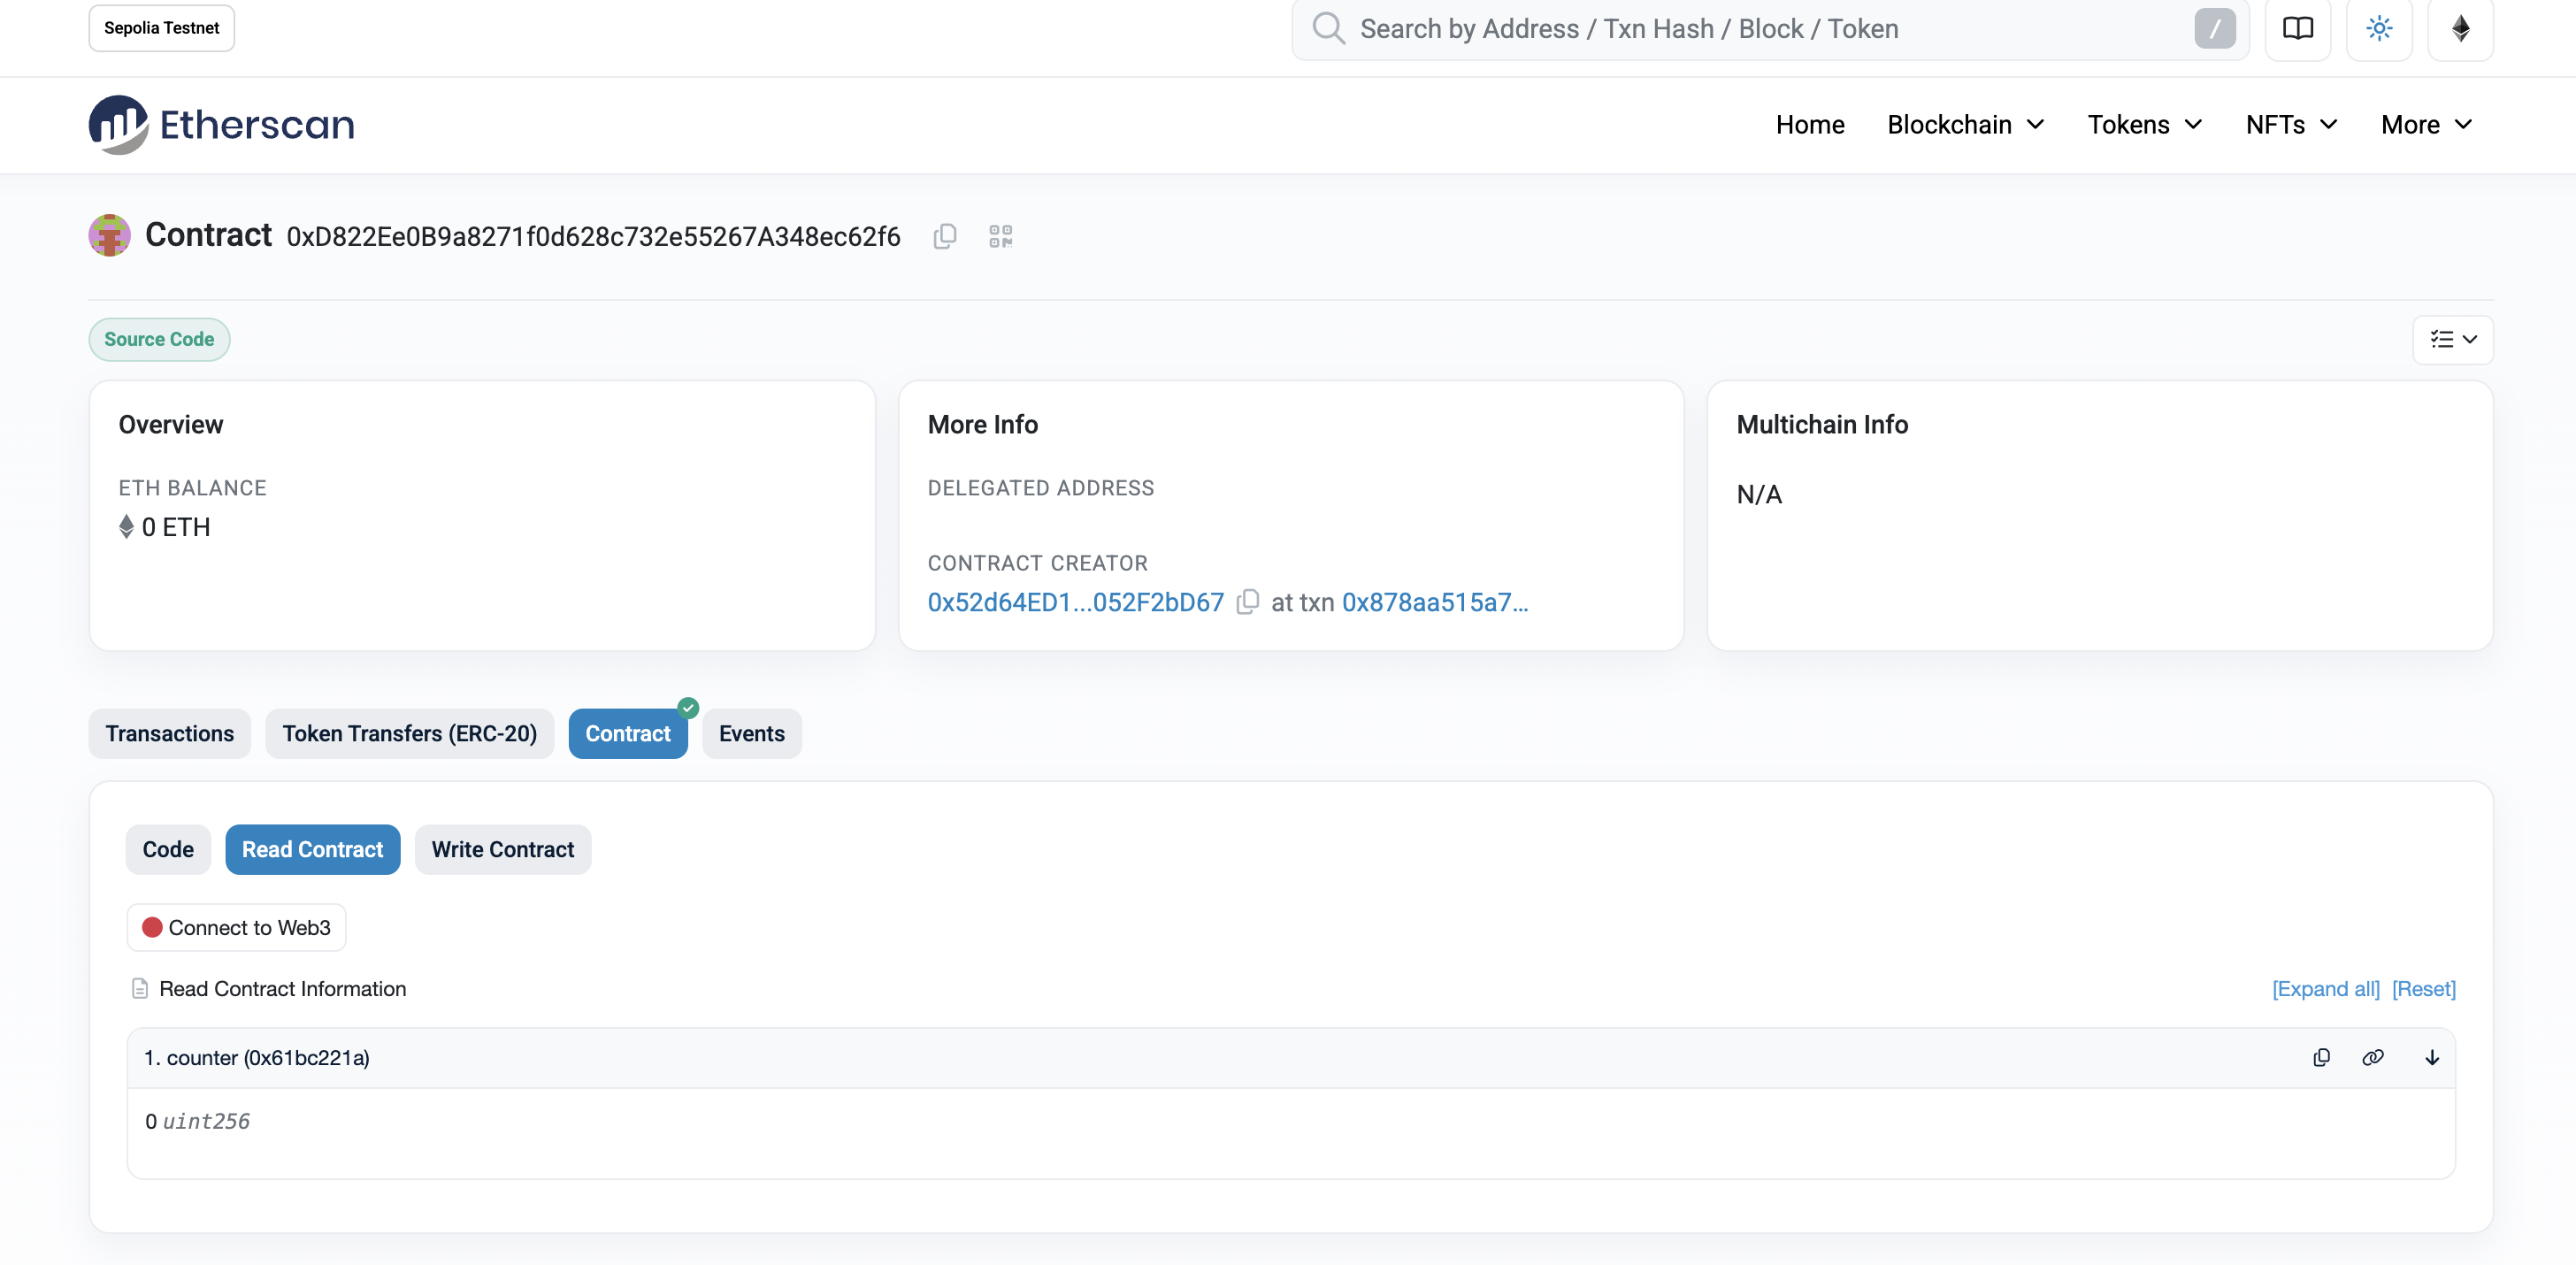 ## Creating a Time-Based Automation Now that we’ve deployed and verified our smart contract let’s create the automation to enable automatic counting. - Head to the Chainlink [Automation app](https://automation.chain.link/) - Click **Register new Upkeep** and then **Connect wallet** to connect MetaMask to the Automation app. - Check that you’re connected to Sepolia by clicking the network dropdown in the app's top-right corner. - For the trigger mechanism, select **Time-based trigger** and click **Next**. 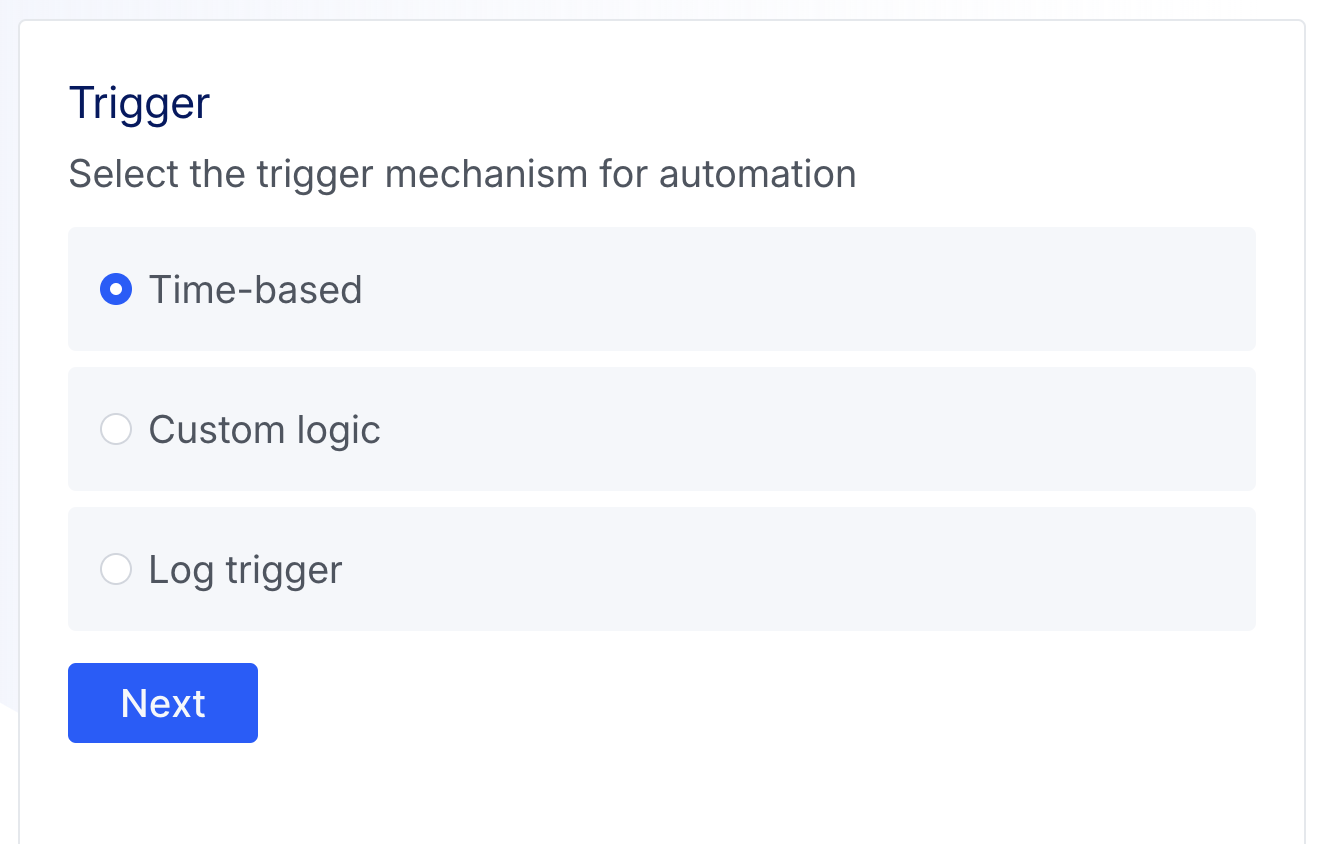 - Enter the `TimeBased` contract address and click **Next**. Our contract has been verified in this example, meaning Chainlink Automation can fetch the ABI. If you have a contract that has yet to be verified, you can provide the ABI. 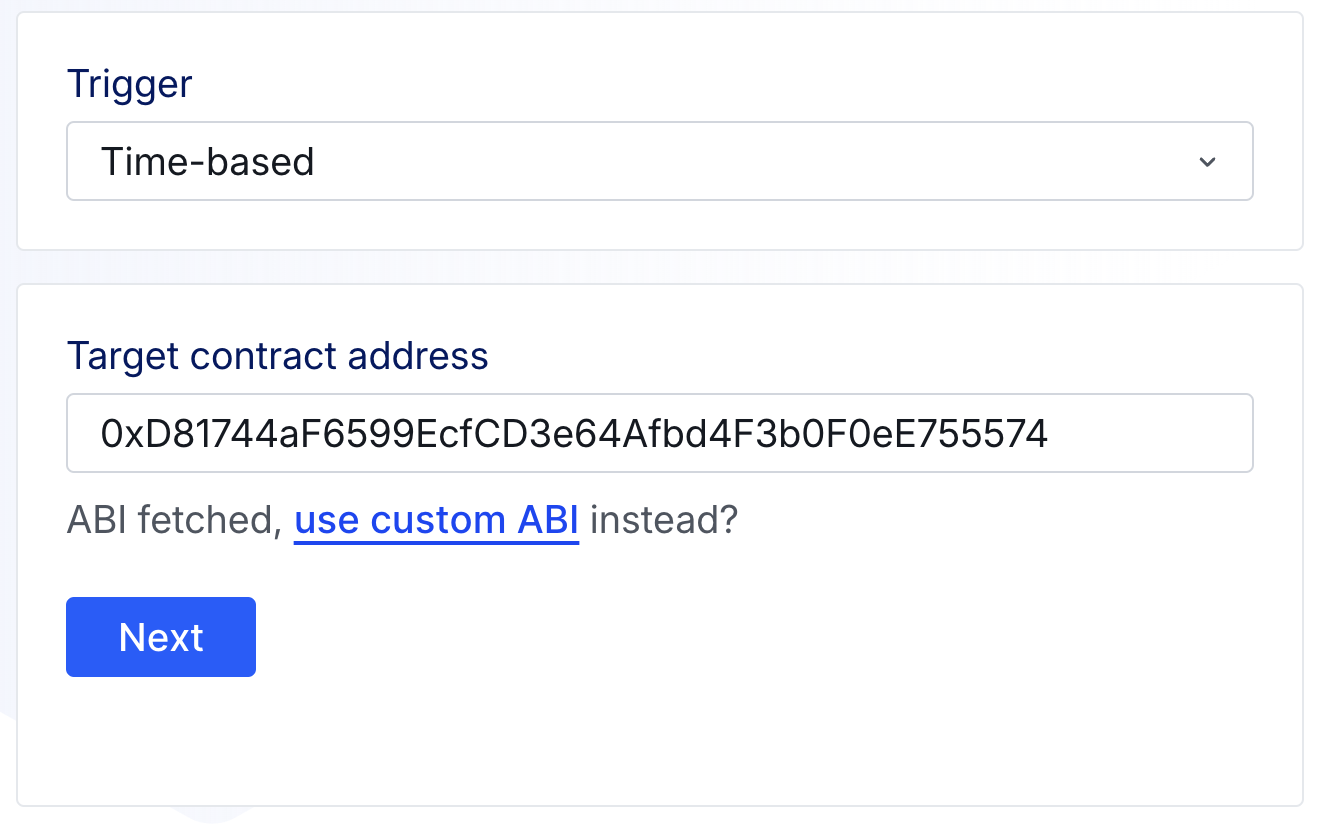 - For the **Target function**, select the `count` function; this is the function we want Automation to execute, and click **Next**. - Now, we must decide _when_ we want the function to run. In this example, we’ll have it run every five minutes or as a **Cron expression**: `*/5 * * * *` Cron schedules are based on five values: minute, hour, day of the month, and day of the week. Each field is represented by a number (or a special character): Time (in UTC): 1. Minute: `0 - 59` 2. Hour: `0 - 23` (`0` = midnight) 3. Day of month: `1 - 31` 4. Month: `1 - 12` (or names, like `Jan`, `Feb`) 5. Day of week: `0 - 6` (`0` = Sunday, or names like `Sun`, `Mon`) Special characters: - `*` means “every” (every minute, every hour, etc.) - `,` lets you list multiple values (e.g., `1,3,5`) - `-` specifies a range (e.g., `1-5`) - `/` allows you to specify step values (e.g., `*/5` for “every 5 units”) Examples: - `30 2 * * *`: Run at 2:30 AM every day - `0 */2 * * *`: Run every 2 hours - `0 9-17 * * 1-5`: Run every hour from 9 AM to 5 PM, Monday to Friday - `*/15 * * * *`: Run every 15 minutes - `0 0 1,15 * *`: Run at midnight on the 1st and 15th of each month - Select your **Cron expression**, `*/5 * * * *`, and click **Next**. - Fill in the **Upkeep details**: - **Upkeep name**: A name for the upkeep visible on the Automation dashboard, e.g. **"TimeBased Counter"** - **Admin Address**: This will be your connected wallet by default, but you can change which address will be the admin for the upkeep here. - **Gas limit**: The maximum amount of gas your selected function for upkeep will need to perform. This is `500_000` by default. - **Starting balance**: A starting balance of LINK is used to pay for Chainlink Automation. In this example, `5` LINK will be sufficient. - The **Project information** is optional; we will leave it blank. 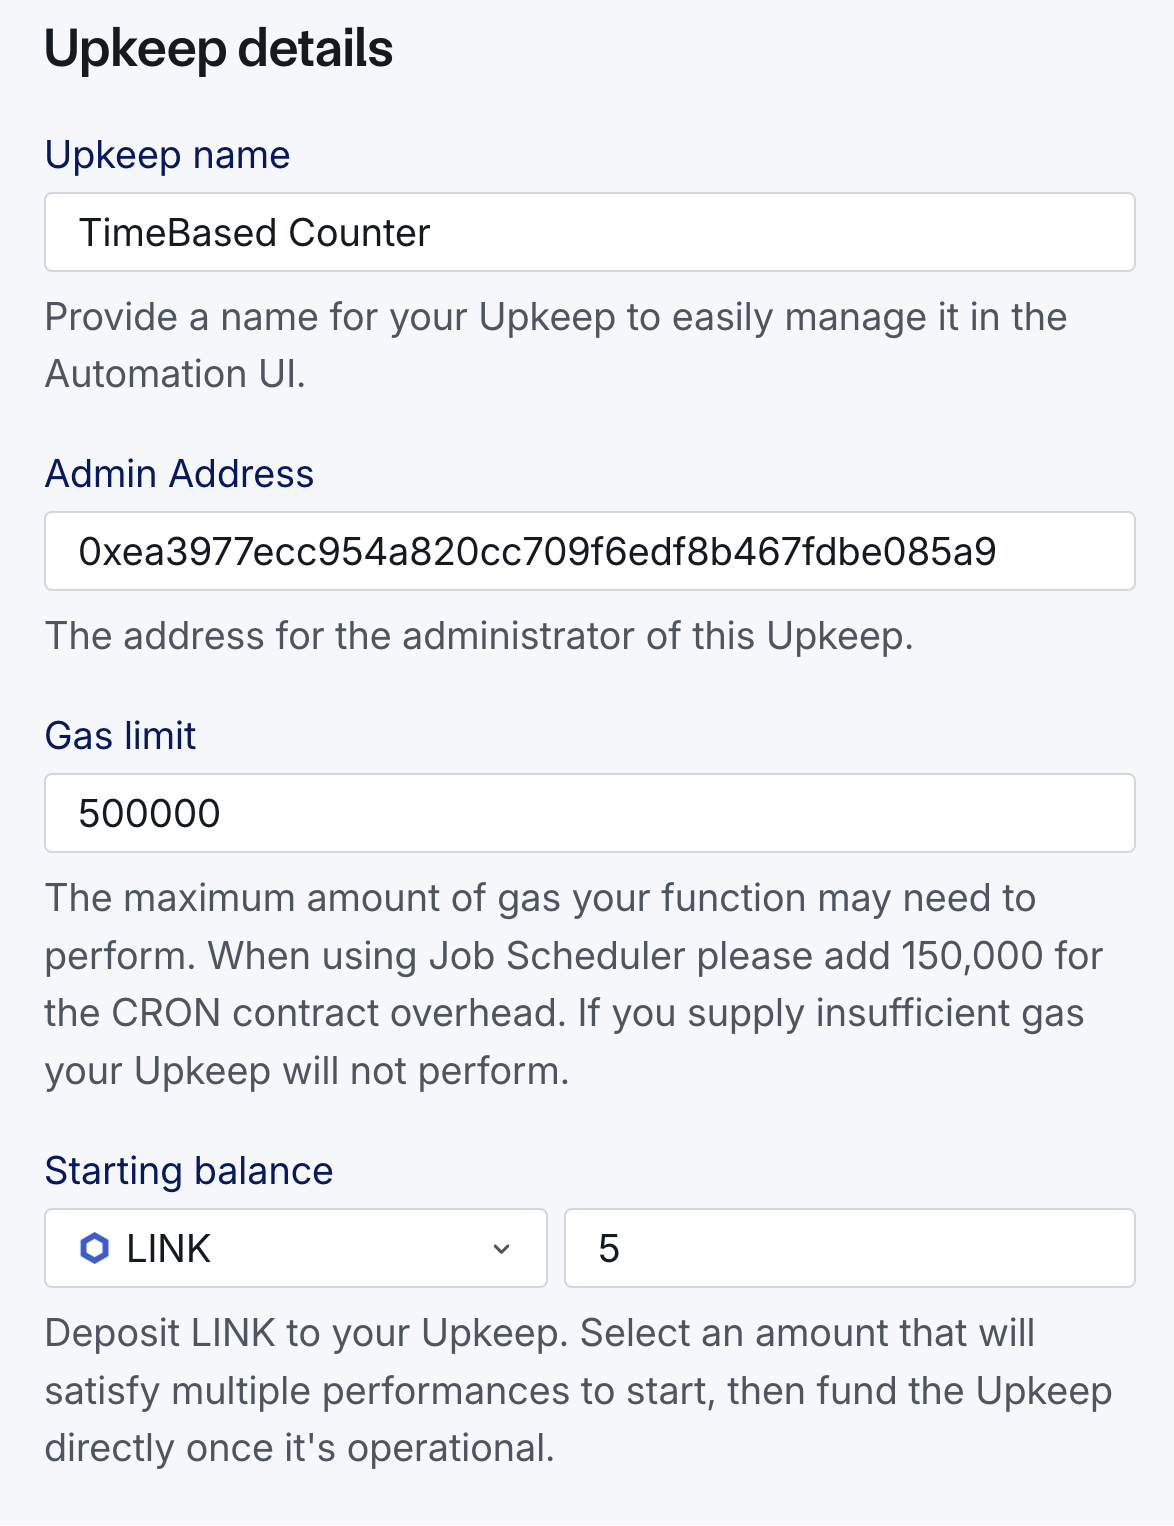 - Click **Register Upkeep** and approve the transactions to deploy the CRON job contract, request time-based upkeep registration, receive registration confirmation, and finally sign the message. 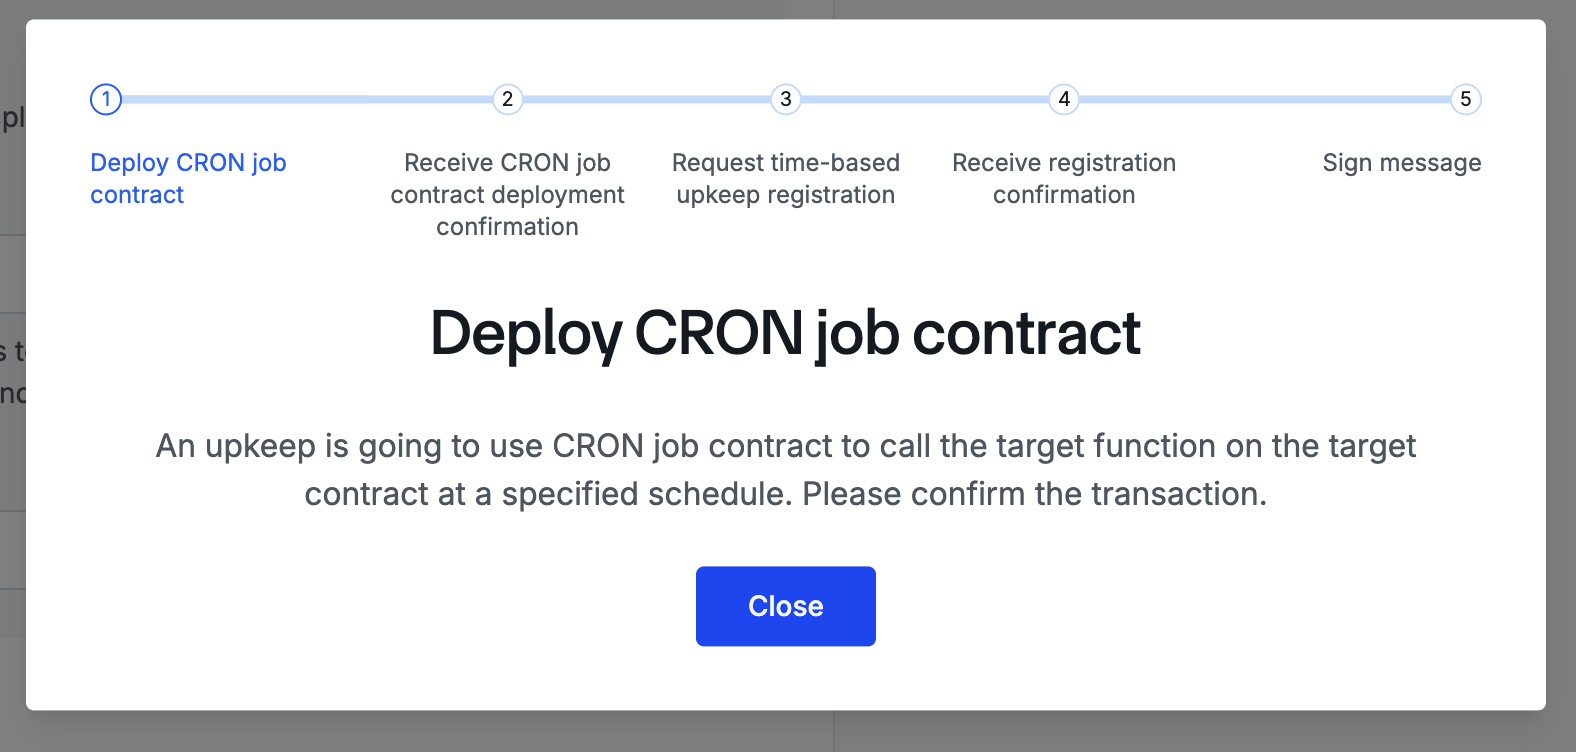 - Once this is complete, you should see that your registration request was successful, and you can then view your upkeep. The **upkeep page** provides a quick overview of the upkeep status, such as when it was last run, the current balance of LINK, and how much LINK has been spent. 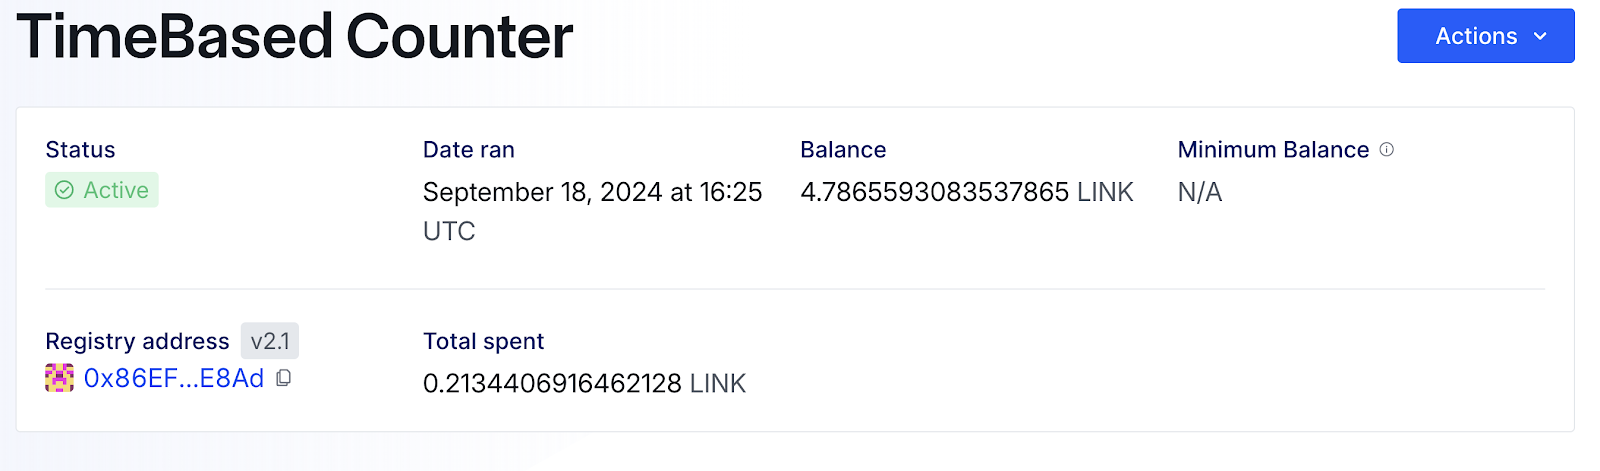 The **details section** will give you all the information about the upkeep, including when it will run next and what function it will call. 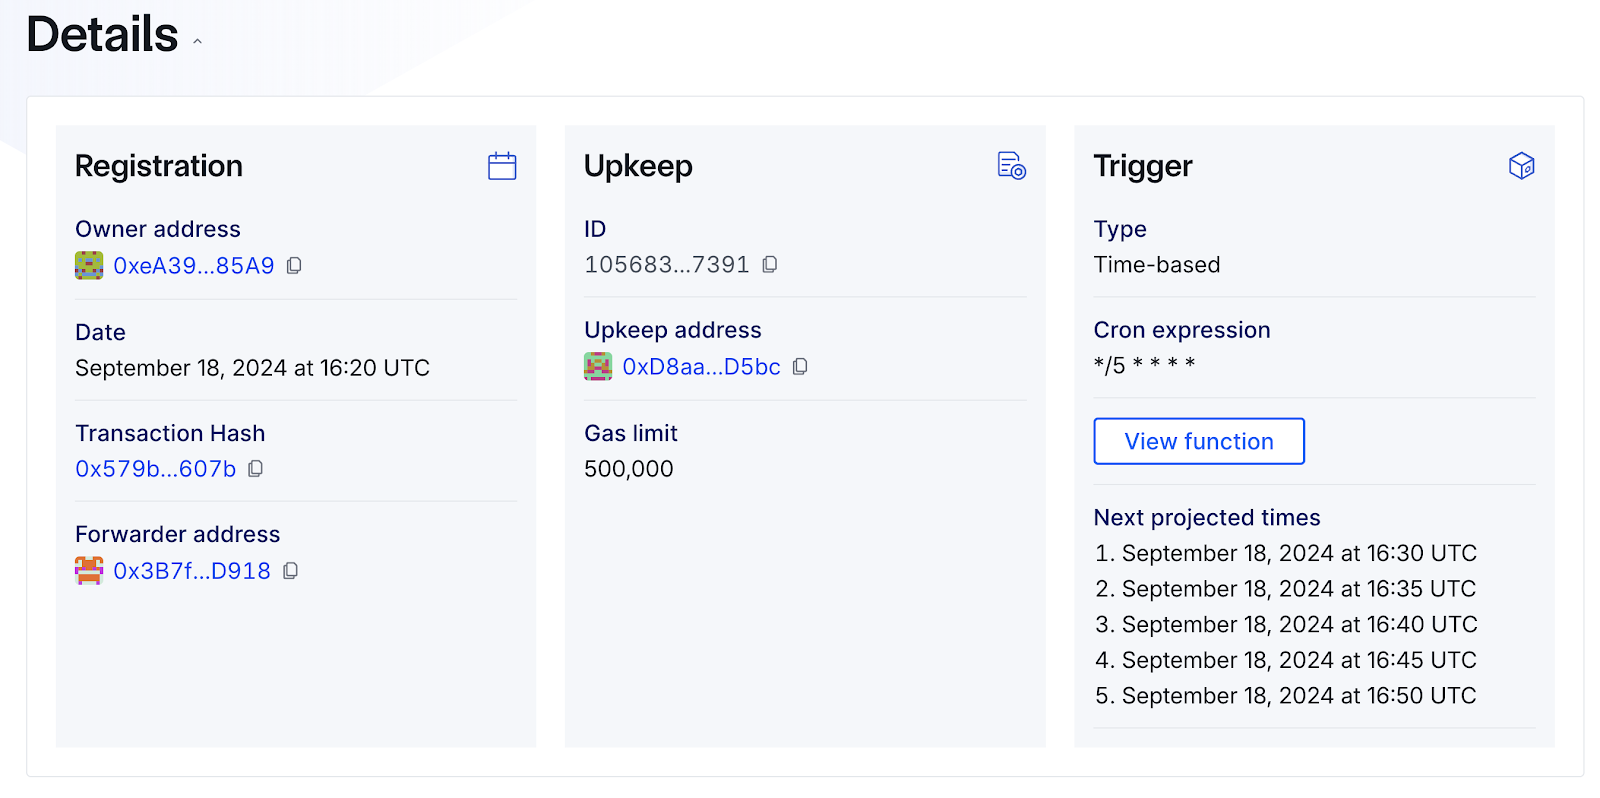 The **history section** shows the history of the upkeep. It is a useful tool for verifying whether an upkeep has been completed. Once five minutes have passed, you should be able to refresh the page and see that the upkeep has been completed. 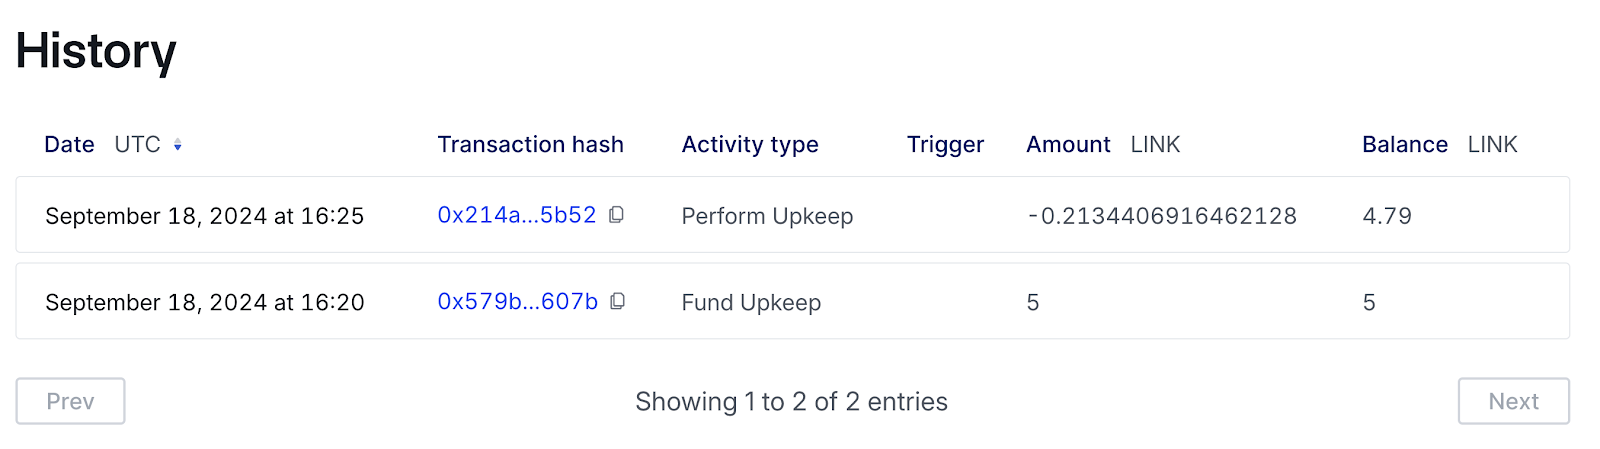 If you head back to Etherscan, you can see the value of `counter` has increased. The upkeep will continue until it either runs out of LINK or the upkeep is paused. 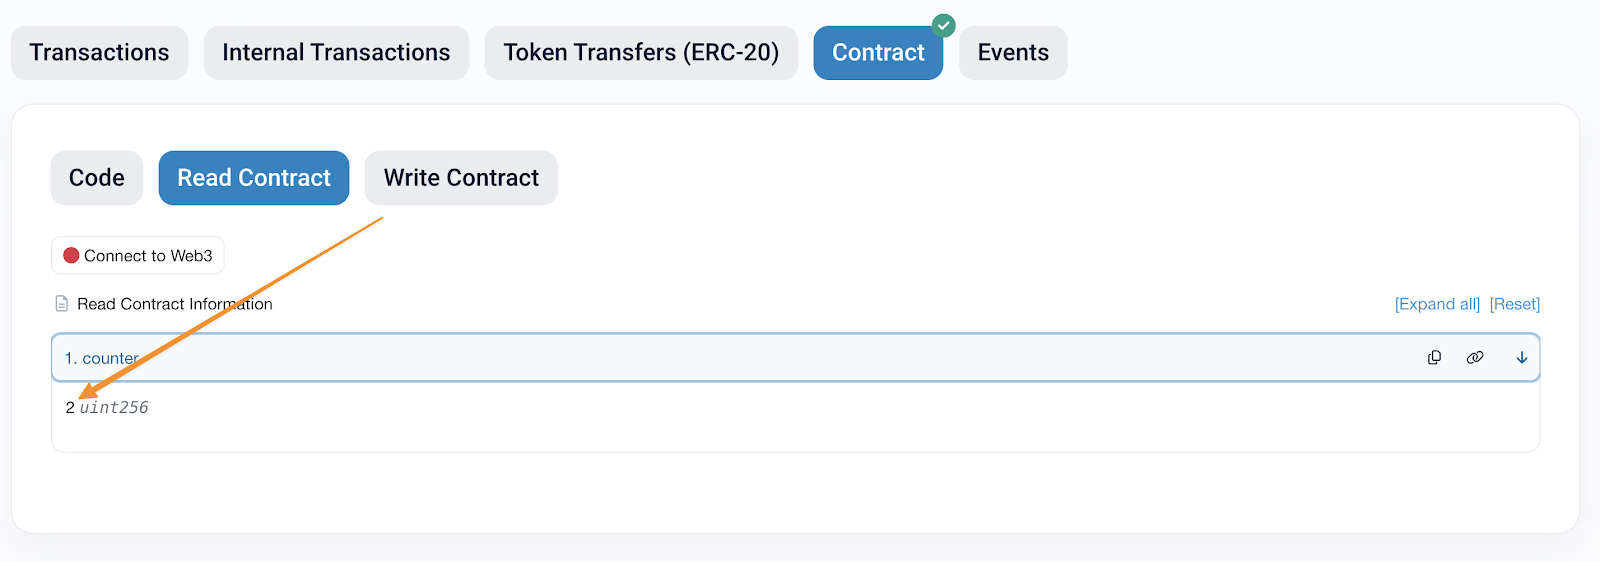 **Note**: You can pause your automation from the Automation app UI or withdraw your LINK funds from it if you want it to stop running. You can always resume it later if necessary or create a new one for future projects.
Time-Based Automation
Time-based automation enables you to automate any function in an existing smart contract that is externally callable. For this exercise, we will deploy a contract on Ethereum Sepolia. The contract will be a basic counter contract with one function: count. We will then use Automation to call count every 5 minutes.
Prerequisites
Creating a Counter Contract
Open Remix and create a new workspace by clicking the burger icon and then Create blank workspace. Name the workspace "Automation" and click Ok:

Create a folder called
contractsby clicking the Create folder button:

Open the
contractsfolder by clicking on it and then create a file calledTimeBased.solby clicking on the Create file button:

Paste the following code from the course code repo into the
TimeBased.solfile.
This simple smart contract stores a counter state variable (initially with the default value of 0) that is incremented when count is called.
Tip: counter ++ is equivalent to writing counter = counter + 1. It's a fun little Solidity shortcut - neat right!
Deloying the TimeBased contract
Let's deploy this contract to Sepolia.
Head to the Solidity compiler tab and click Compile TimeBased.sol to compile your contract.

Head to the Deploy & run transactions tab and select Injected Provider - MetaMask for the Environment to connect MetaMask to Remix.

-
Open MetaMask and check you are still connected to Sepolia by clicking the top left-hand network selector button.
-
Click Deploy to deploy the
TimeBasedcontract. This will trigger MetaMask to pop up. Click Confirm to sign the transaction to deploy the contract.

You will know if your contract has been successfully deployed if:
The Remix terminal window (the block at the bottom of your screen) shows a green tick next to the transaction information:

Your MetaMask shows a successful contract deployment transaction:

And your contract is in the Deployed contracts section:

-
Click the pin icon to the workspace to pin the
TimeBasedsmart contract. This will ensure that the contract instance persists in your workspace when Remix is reloaded. -
Finally, copy the
TimeBasedcontract address by clicking the copy button next to the pin.
Note: From this point forward, I will assume you are comfortable with the following actions in Remix:
Creating new workspaces, folders, and files.
Compiling smart contracts.
Connecting MetaMask to Remix.
Deploying smart contracts.
Pinning smart contracts to a workspace.
This is to avoid repetition. If you need a reminder, please review the Remix walk-through in Section 2.
Verify the smart contract
Verification allows block explorers and other services, such as Chainlink Automation, to access the contract's ABI and, therefore, its functions. In order for Automation to be able to call count, we need to first verify our smart contract.
Let’s verify our contract on Etherscan.
Head to the Etherscan website.
Search for the
TimeBasedcontract address, then head to the Contract tab and click Verify and Publish.

Fill in the values for your contract. The compiler version can be found on the Solidity compiler tab in Remix. Click Continue.

On the next screen, paste in the code for the contract and leave the rest of the options default/blank. Click Verify and Publish.
When you return to the contract on Etherscan, you should now see a green checkmark next to the Contract tab. Now, you can view the source code on Etherscan and easily interact with the contract from the Read contract and Write contract tabs.

Creating a Time-Based Automation
Now that we’ve deployed and verified our smart contract let’s create the automation to enable automatic counting.
Head to the Chainlink Automation app
Click Register new Upkeep and then Connect wallet to connect MetaMask to the Automation app.
Check that you’re connected to Sepolia by clicking the network dropdown in the app's top-right corner.
For the trigger mechanism, select Time-based trigger and click Next.

Enter the
TimeBasedcontract address and click Next. Our contract has been verified in this example, meaning Chainlink Automation can fetch the ABI. If you have a contract that has yet to be verified, you can provide the ABI.

-
For the Target function, select the
countfunction; this is the function we want Automation to execute, and click Next. -
Now, we must decide when we want the function to run. In this example, we’ll have it run every five minutes or as a Cron expression:
*/5 * * * *
Cron schedules are based on five values: minute, hour, day of the month, and day of the week.
Each field is represented by a number (or a special character):
Time (in UTC):
Minute:
0 - 59Hour:
0 - 23(0= midnight)Day of month:
1 - 31Month:
1 - 12(or names, likeJan,Feb)Day of week:
0 - 6(0= Sunday, or names likeSun,Mon)
Special characters:
*means “every” (every minute, every hour, etc.),lets you list multiple values (e.g.,1,3,5)-specifies a range (e.g.,1-5)/allows you to specify step values (e.g.,*/5for “every 5 units”)
Examples:
-
30 2 * * *: Run at 2:30 AM every day -
0 */2 * * *: Run every 2 hours -
0 9-17 * * 1-5: Run every hour from 9 AM to 5 PM, Monday to Friday -
*/15 * * * *: Run every 15 minutes -
0 0 1,15 * *: Run at midnight on the 1st and 15th of each month -
Select your Cron expression,
*/5 * * * *, and click Next. -
Fill in the Upkeep details:
Upkeep name: A name for the upkeep visible on the Automation dashboard, e.g. "TimeBased Counter"
Admin Address: This will be your connected wallet by default, but you can change which address will be the admin for the upkeep here.
Gas limit: The maximum amount of gas your selected function for upkeep will need to perform. This is
500_000by default.Starting balance: A starting balance of LINK is used to pay for Chainlink Automation. In this example,
5LINK will be sufficient.The Project information is optional; we will leave it blank.

Click Register Upkeep and approve the transactions to deploy the CRON job contract, request time-based upkeep registration, receive registration confirmation, and finally sign the message.

Once this is complete, you should see that your registration request was successful, and you can then view your upkeep.
The upkeep page provides a quick overview of the upkeep status, such as when it was last run, the current balance of LINK, and how much LINK has been spent.

The details section will give you all the information about the upkeep, including when it will run next and what function it will call.

The history section shows the history of the upkeep. It is a useful tool for verifying whether an upkeep has been completed. Once five minutes have passed, you should be able to refresh the page and see that the upkeep has been completed.

If you head back to Etherscan, you can see the value of counter has increased. The upkeep will continue until it either runs out of LINK or the upkeep is paused.

Note: You can pause your automation from the Automation app UI or withdraw your LINK funds from it if you want it to stop running. You can always resume it later if necessary or create a new one for future projects.
Time Based Automation
A practical guide to Time-Based Automation - Learn to deploy a basic `Counter` contract on Sepolia using Remix and verify it on Etherscan. Set up and fund a Chainlink Automation upkeep to trigger the `count` function every 5 minutes using a Cron schedule.

Course Overview
About the course
What you'll learn
Smart contract and Solidity fundamentals
Chainlink’s decentralized oracle network (DON)
Chainlink Data Feeds
Chainlink Data Streams
Chainlink Automation
Chainlink CCIP
Chainlink Functions
Verifiable Random Function (VRF)
Chainlink Proof of Reserve
Course Description
Who is this course for?
- Smart Contract Developers
- Solutions Architects
- Blockchain Engineers
- Web3 Developers
- Security Researchers
Potential Careers
Smart Contract Engineer
$100,000 - $150,000 (avg. salary)
DeFi Developer
$75,000 - $200,000 (avg. salary)
Web3 developer
$60,000 - $150,000 (avg. salary)
Web3 Developer Relations
$85,000 - $125,000 (avg. salary)
Smart Contract Auditor
$100,000 - $200,000 (avg. salary)
Security researcher
$49,999 - $120,000 (avg. salary)
Blockchain Financial Analyst
$100,000 - $150,000 (avg. salary)


Last updated on July 25, 2025

Certification: Chainlink Fundamentals
The Chainlink Fundamentals proficiency exam covers is designed to confirm your grasp of all key concepts and learnings presented in the course material. Exam takers will have 75 minutes to complete 50 questions and must score 30/50 to pass and earn a Certificate of Completion. Because course material is continually updated, The Chainlink Fundamentals Certificate of Completions expires after 1 year. To remain current, holders must re-take the exam and pass to confirm their current knowledge.

Course Overview
About the course
What you'll learn
Smart contract and Solidity fundamentals
Chainlink’s decentralized oracle network (DON)
Chainlink Data Feeds
Chainlink Data Streams
Chainlink Automation
Chainlink CCIP
Chainlink Functions
Verifiable Random Function (VRF)
Chainlink Proof of Reserve
Course Description
Who is this course for?
- Smart Contract Developers
- Solutions Architects
- Blockchain Engineers
- Web3 Developers
- Security Researchers
Potential Careers
Smart Contract Engineer
$100,000 - $150,000 (avg. salary)
DeFi Developer
$75,000 - $200,000 (avg. salary)
Web3 developer
$60,000 - $150,000 (avg. salary)
Web3 Developer Relations
$85,000 - $125,000 (avg. salary)
Smart Contract Auditor
$100,000 - $200,000 (avg. salary)
Security researcher
$49,999 - $120,000 (avg. salary)
Blockchain Financial Analyst
$100,000 - $150,000 (avg. salary)
Last updated on July 25, 2025