# Transferring Tokens Cross-chain in a Smart Contract Part 2 In the previous lesson, we wrote and deployed a smart contract to send USDC from Sepolia to Base Sepolia. In this lesson, we will perform that cross-chain transfer using Chainlink CCIP. ## Funding the contract with LINK To send tokens cross-chain, we need to fund our `CCIPTokenSender` function with LINK tokens to pay for the cross-chain transfer. This is a recap of what you learned in Section 2, Lesson 3, so we are going to go pretty quickly. Revisit that lesson if you'd like a more detailed breakdown. - In MetaMask, click on the **Tokens** tab and click the **LINK** token:  - Click the **Send** button: 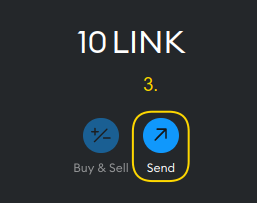 - For the **Send to** address, paste the address of the `CCIPTokenSender` contract we deployed in the previous lesson: 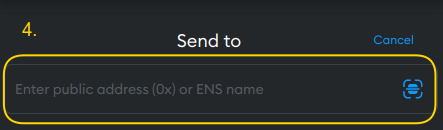 - Enter the **Amount** of LINK to send to the contract. `3` LINK will be sufficient. - Click **Continue**: 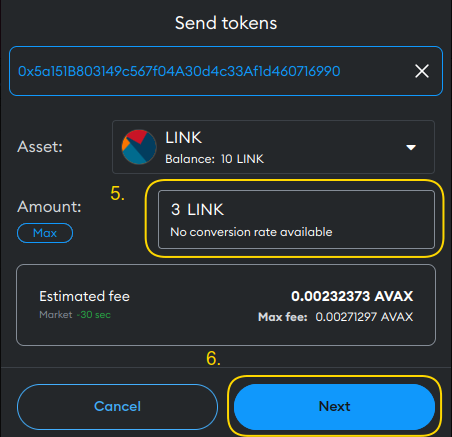 - Click **Confirm** to sign the transaction and send the LINK tokens to the `CCIPTokenSender` contract: 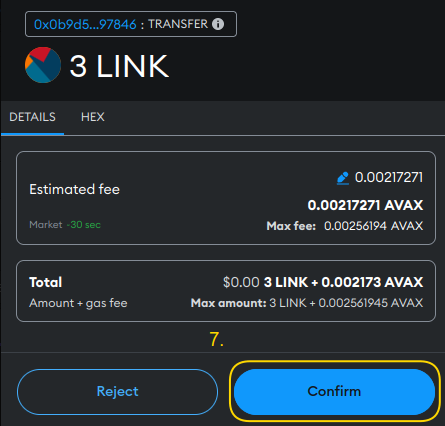 ### Check the contract balance Let's check the LINK tokens successfully transferred to the `CCIPTokenSender` contract by checking its LINK balance. This tutorial uses Etherscan, but you can also use Blockscout or other block explorers. - Navigate to [Etherscan Sepolia](https://sepolia.etherscan.io/) and search the LINK token address on Sepolia: `0x779877A7B0D9E8603169DdbD7836e478b4624789`. - Clic **Connect to Web3** and connect MetaMask to Etherscan. - Click on the **Contract** tabs and then **Read Contract** and find the `balanceOf` function - For the `account`, enter the `CCIPTokenSender` address:  If the transfer is successful, it will produce an output of `300000000000000`, which is 3 LINK in WEI. ## Approve CCIPTokenSender to spend USDC When calling `transferTokens`, the function transfers tokens from the user (represented by `msg.sender`) to the `CCIPTokenSender` contract using the `safeTransferFrom` function, enabling those tokens to be sent cross-chain. Before this can work, the user must first grant permission to the `CCIPTokenSender` contract to transfer their USDC tokens. This permission is given through an "approval" transaction on the USDC contract, which authorizes the `CCIPTokenSender` contract to spend a specific amount of the user's tokens on their behalf. To do this token approval, we are going to interact with the USDC contract on Etherscan Sepolia, as we did the LINK token. - Navigate to [Etherscan Sepolia](https://sepolia.etherscan.io/) and search the USDC token address on Sepolia: `0x1c7D4B196Cb0C7B01d743Fbc6116a902379C7238` - Click on the **Contract** tabs and then **Write as Proxy**, (**Write** since we want to send a transaction that modifies state and **as Proxy** since we want to be calling functions on the implementation contract, and this is a proxy. Don't worry about what this means - it's pretty advanced stuff). - Connect your wallet by clicking the **Connect to Web3** button. - Find the `approve` function and click on it to expand it. - For the `spender`, enter the `CCIPTokenSender` address; for the `value`, enter the number of tokens you want to send cross-chain; we will be sending `1 USDC` or `1000000` since USDC has 6 decimal places: 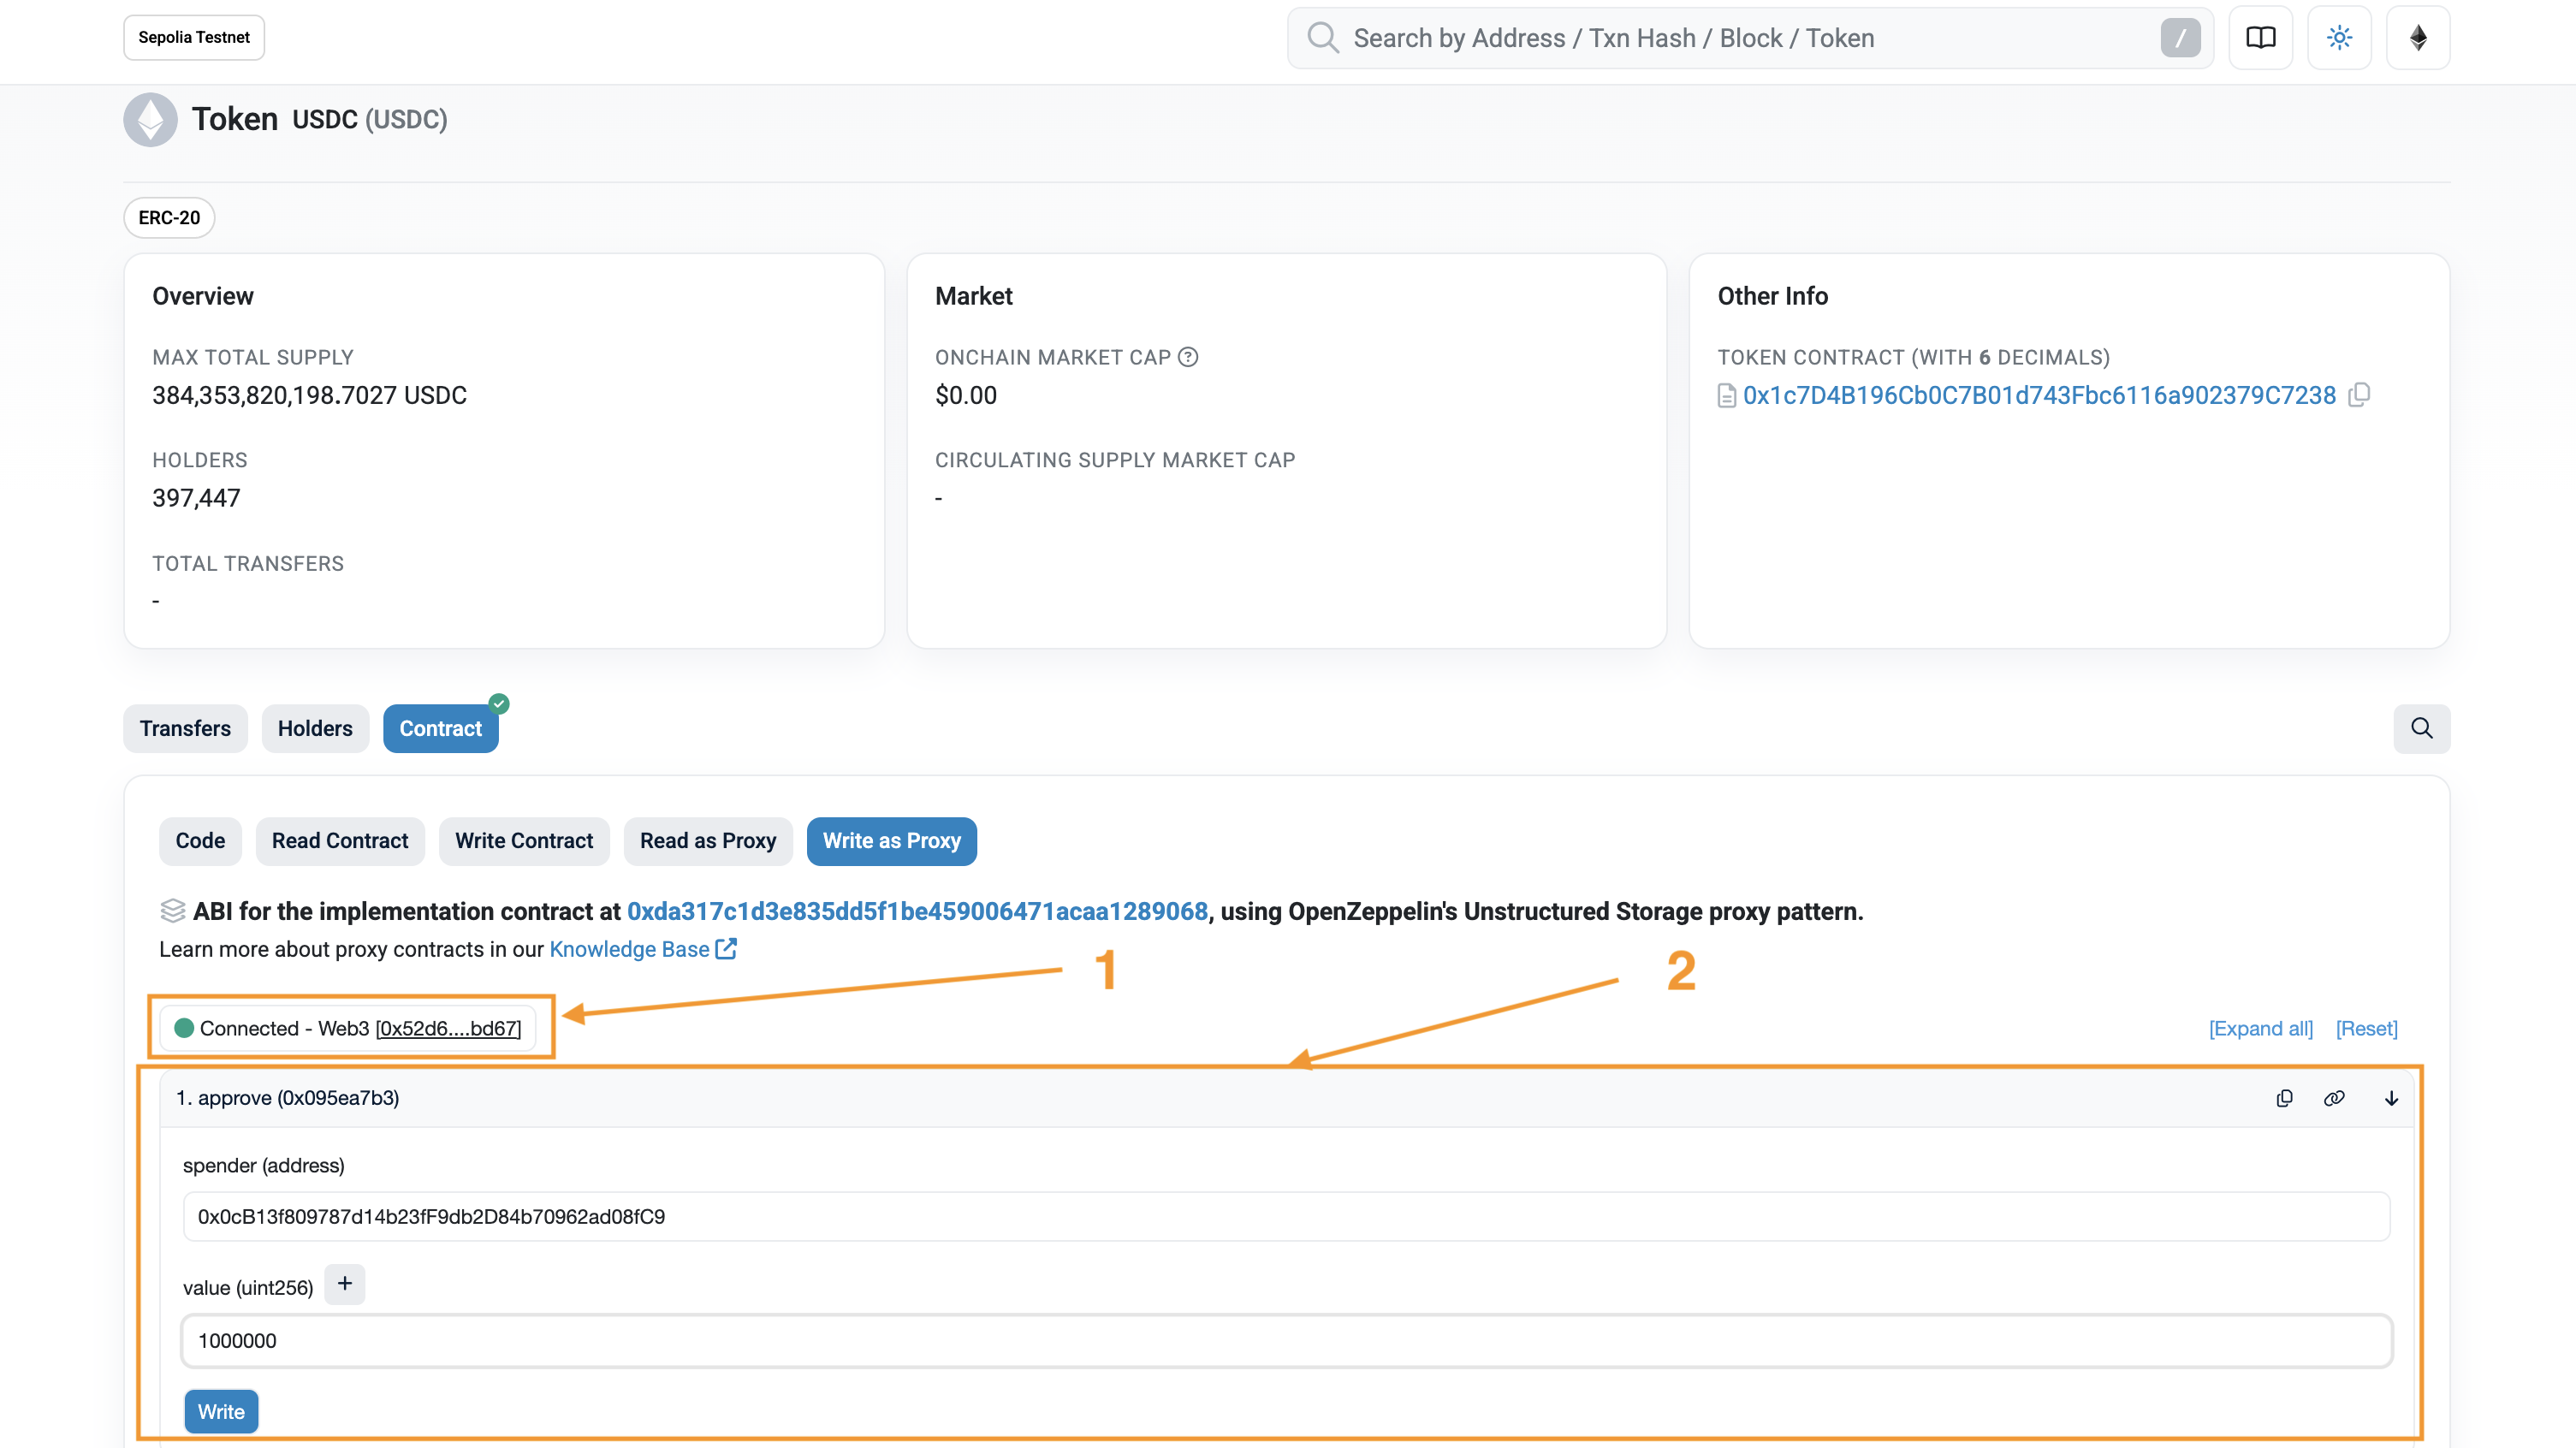 - Click **Write** to initiate the transaction. - Sign the transaction in MetaMask to send the transaction. - To confirm the approval was successful, click the **Read as Proxy** tab and click the `allowance` function. Enter your address as the `owner` and the `CCIPTokenSender` contract address as the `spender`. Then, click **Query**:  - If the approval was successful, you will see an output of `1000000`. ## Executing the Cross-chain Transfer of USDC Let's FINALLY send some USDC from Sepolia to Base Sepolia using CCIP! - Return to Remix and click the **Deploy and run transactions** tab. - Click on the `transferTokens` function and fill out the following inputs: - `_receiver`: paste your wallet address since you will send yourself USDC on the destination chain. Note that, on some blockchains, you are not guaranteed to have the same address. - `_amount`: we are sending `1` USDC cross-chain, so put `1000000`(USDC has 6 decimal places).  - Click **transact** to initiate the transaction. - Sign the message in MetaMask by clicking **Confirm**. 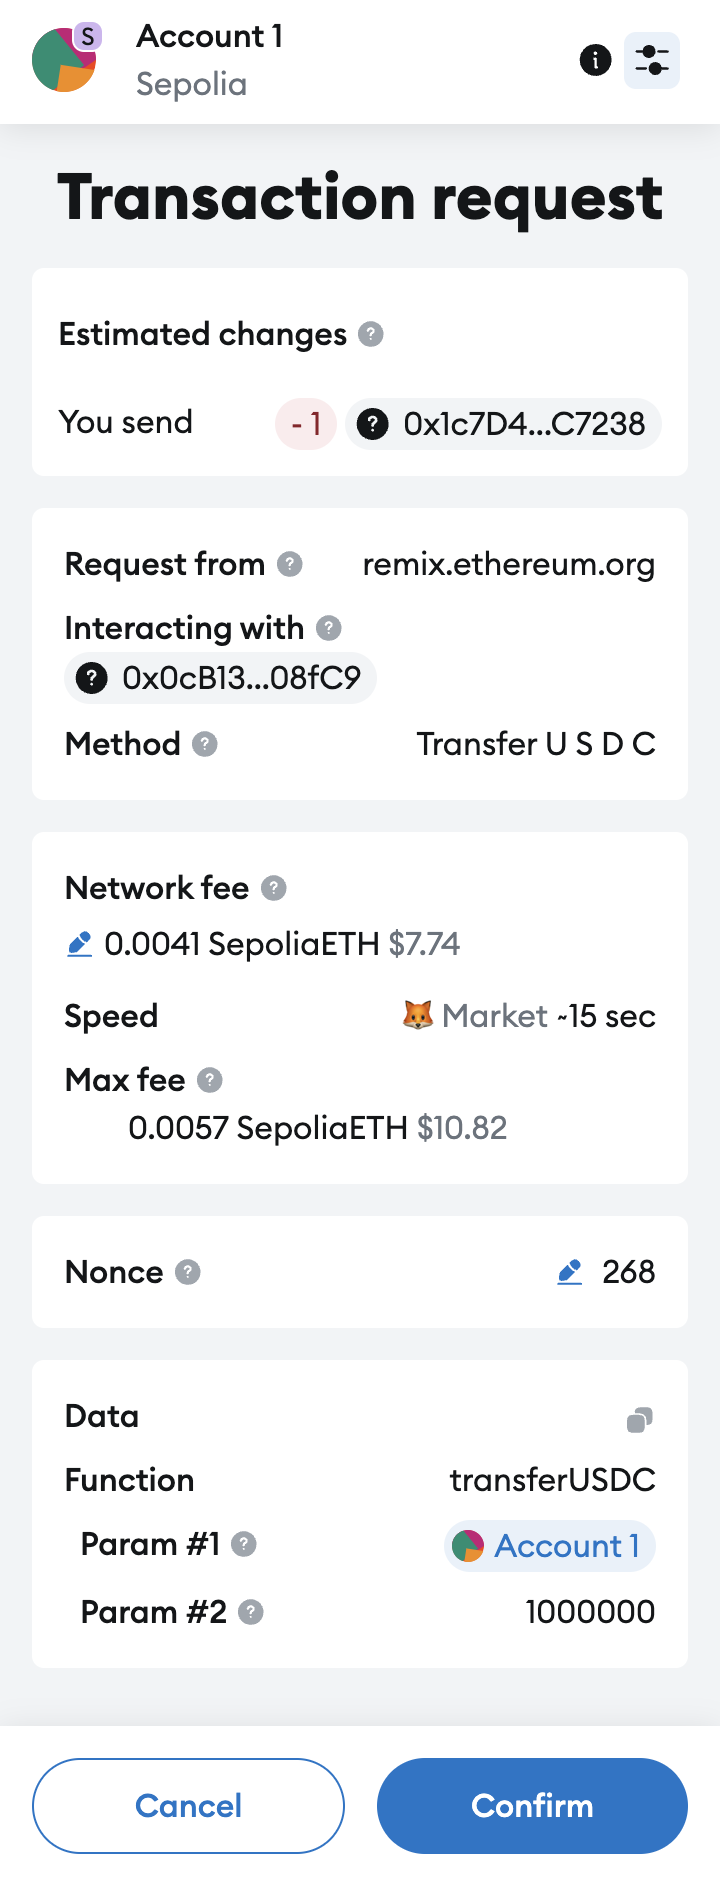 - In Remix, we will see a log in the terminal confirming the transfer has been initiated on Sepolia. 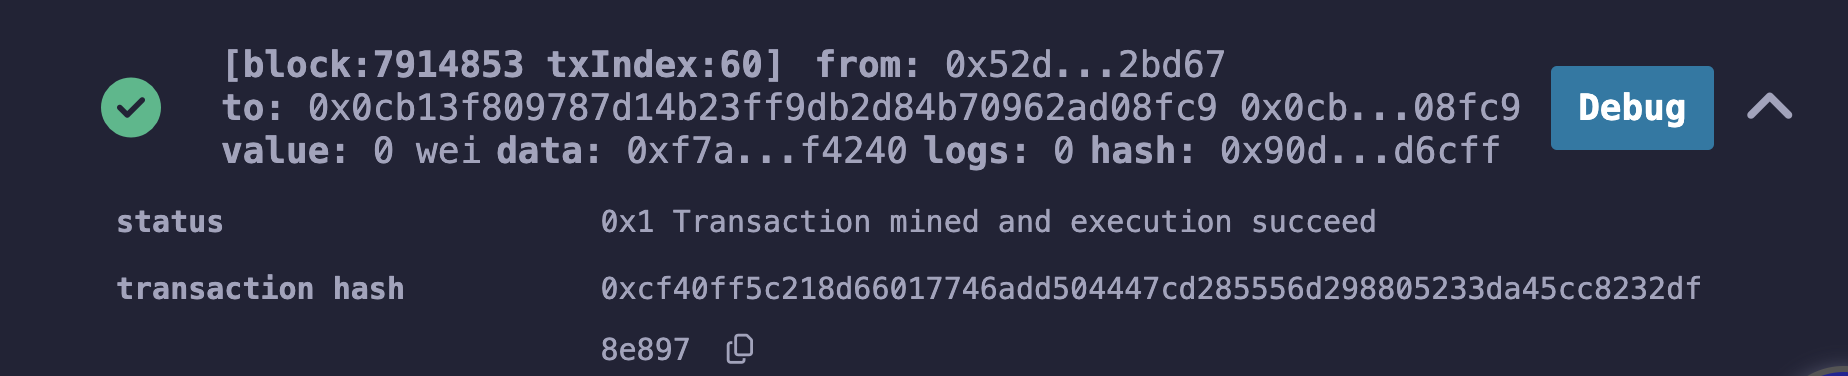 - Copy the transaction hash! We will be using this shortly. You have now successfully initiated a cross-chain transfer from Sepolia to Base Sepolia! Now, we want to track the cross-chain message, see if the minting transaction has occurred on the destination chain, and when we received our bridged tokens. To do this, we will use the CCIP explorer. ## Using the CCIP Explorer After sending a transaction, you can access the [CCIP Explorer](https://ccip.chain.link/) to check the progression of the coss-chain message. Paste the Sepolia transaction hash into the CCIP Explorer search bar:  This will bring up the transaction details for your cross-chain transfer. Here, you will be able to see an overview of the transaction, including the source and destination transactions to burn and mint the tokens, respectively. It will also show the **Status** of the cross-chain message. The tokens are only received on the destination chain after full finality is reached on the source chain. For Ethereum Sepolia, this is approximately 20 minutes, but the times for different chains can be found in the Chainlink documentation. 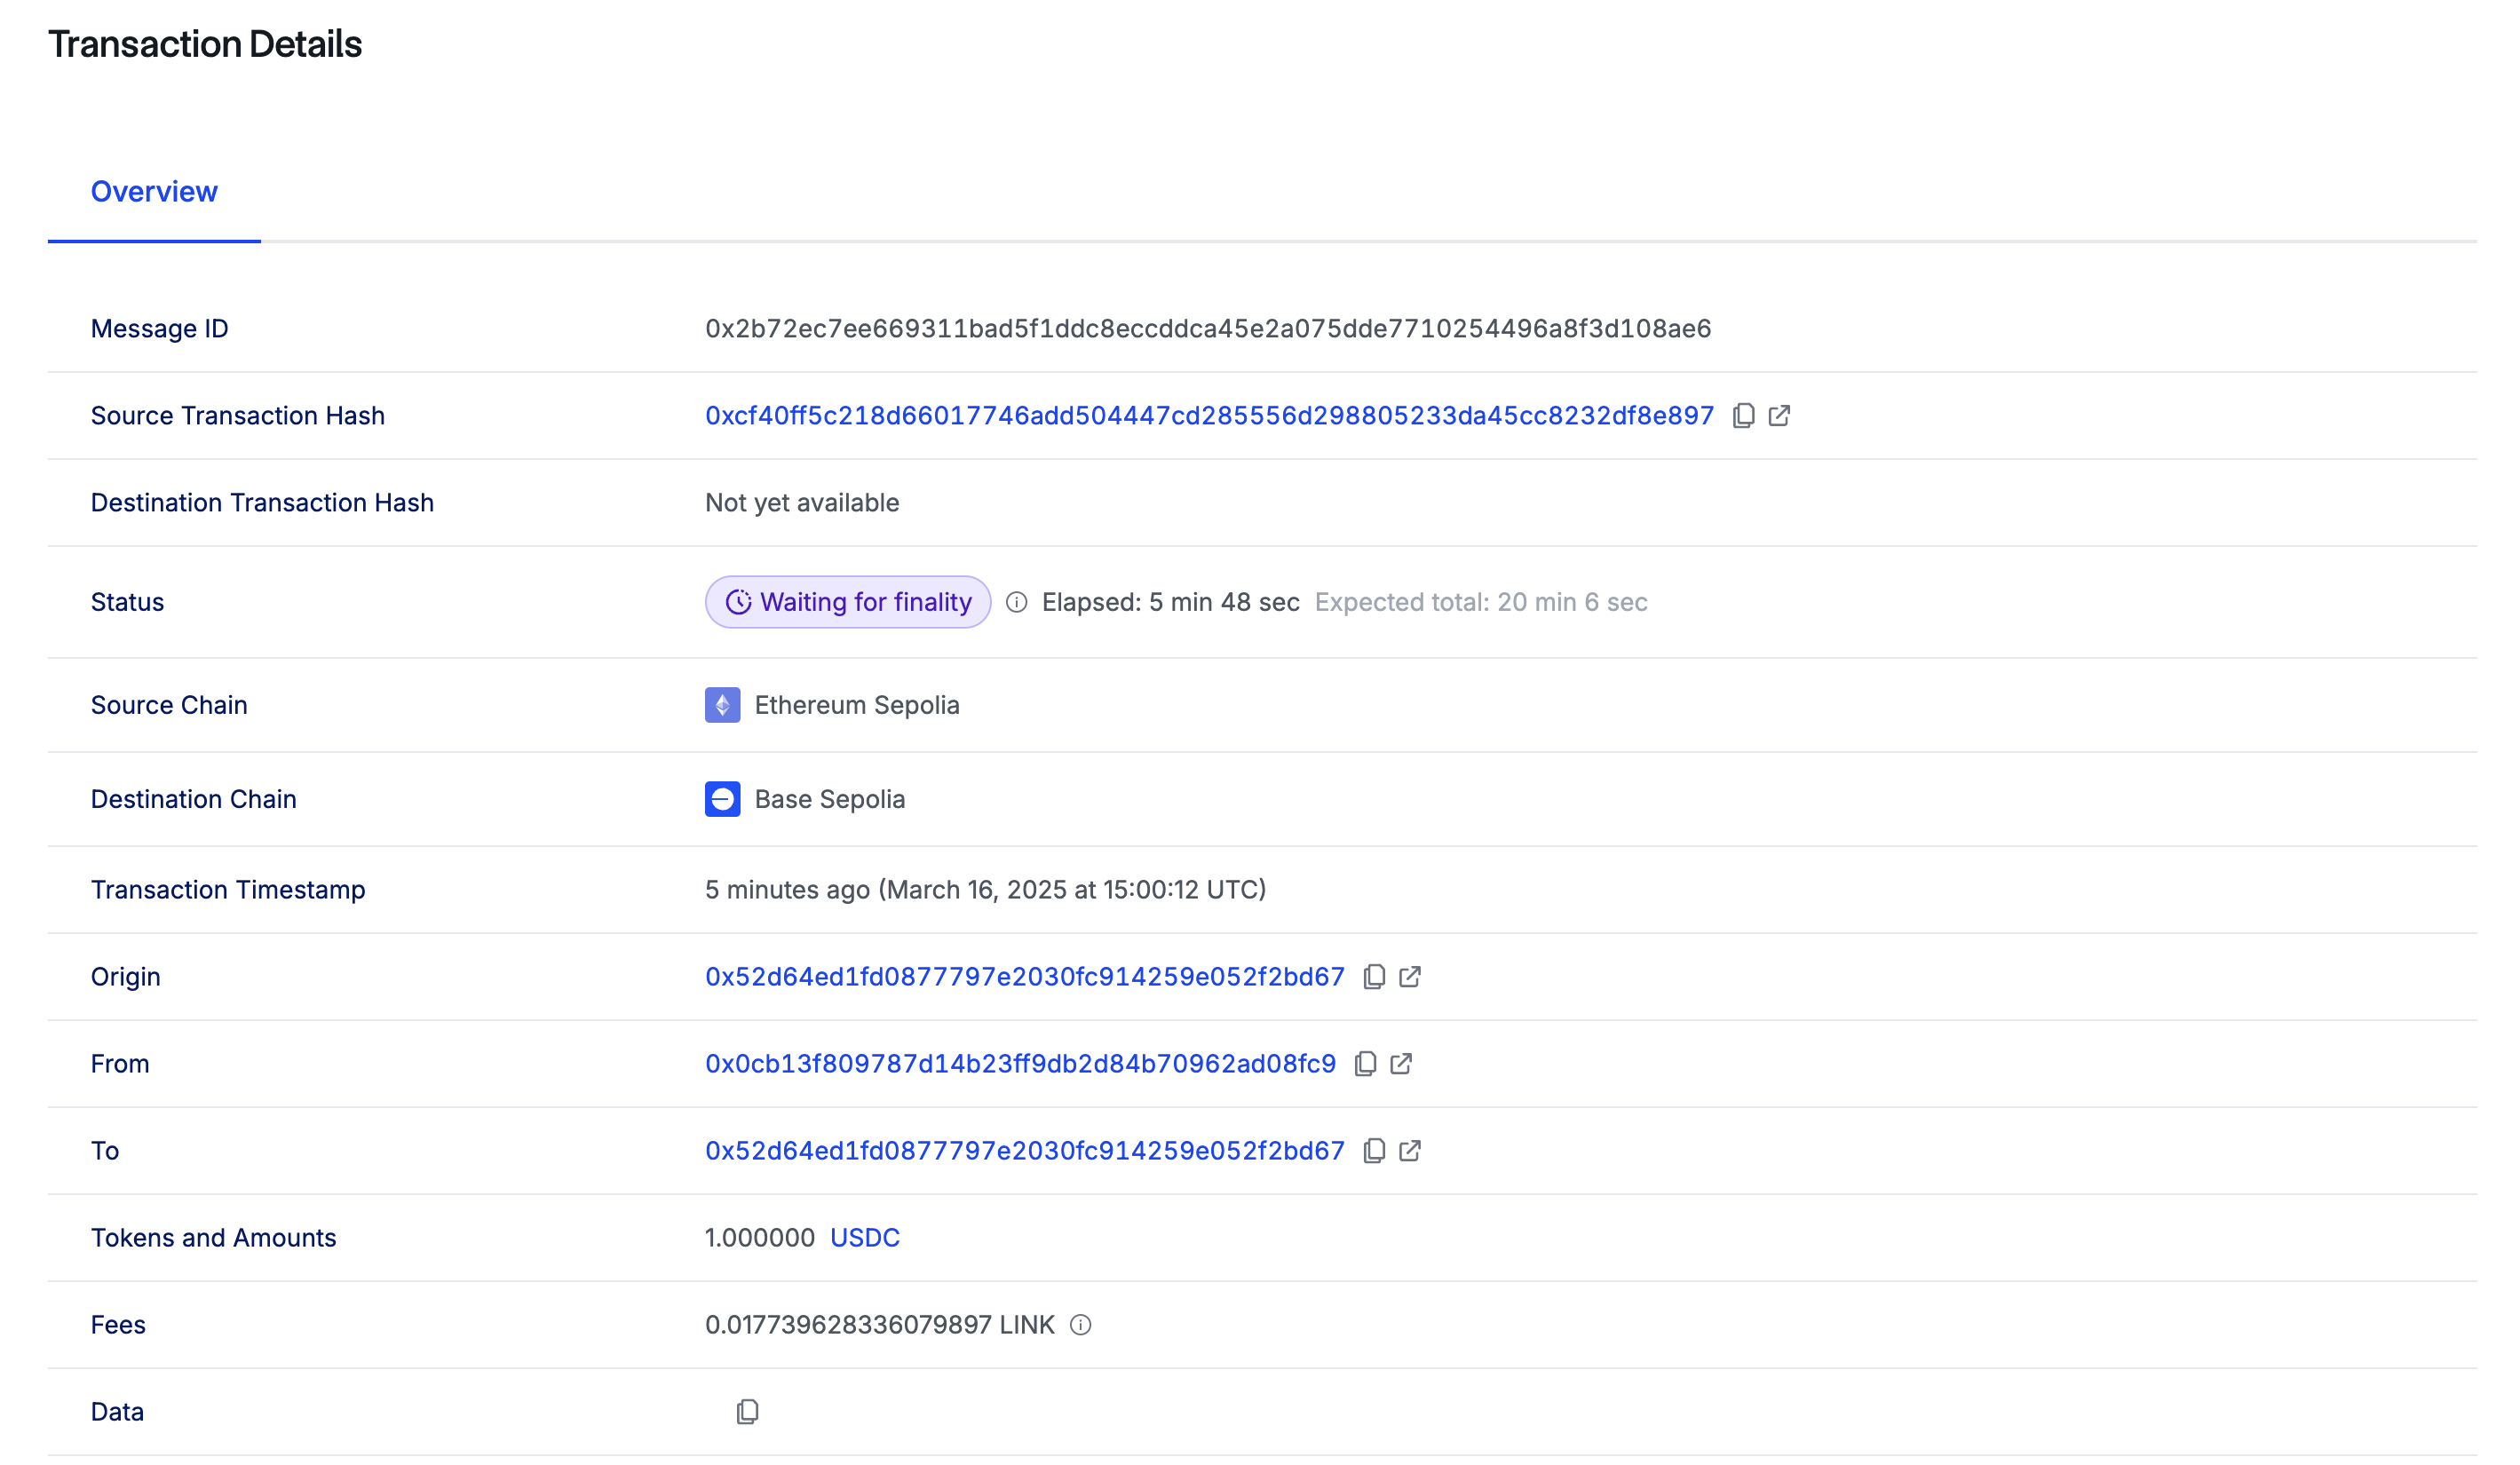 When the message's status changes from **Waiting for finality** to **Success**, you will have received your tokens on the destination chain:  To check your USDC balance, switch your network inside MetaMask to Base Sepolia and then check your USDC balance in the **Tokens** tab (assuming you have imported the USDC token on Base Sepolia). 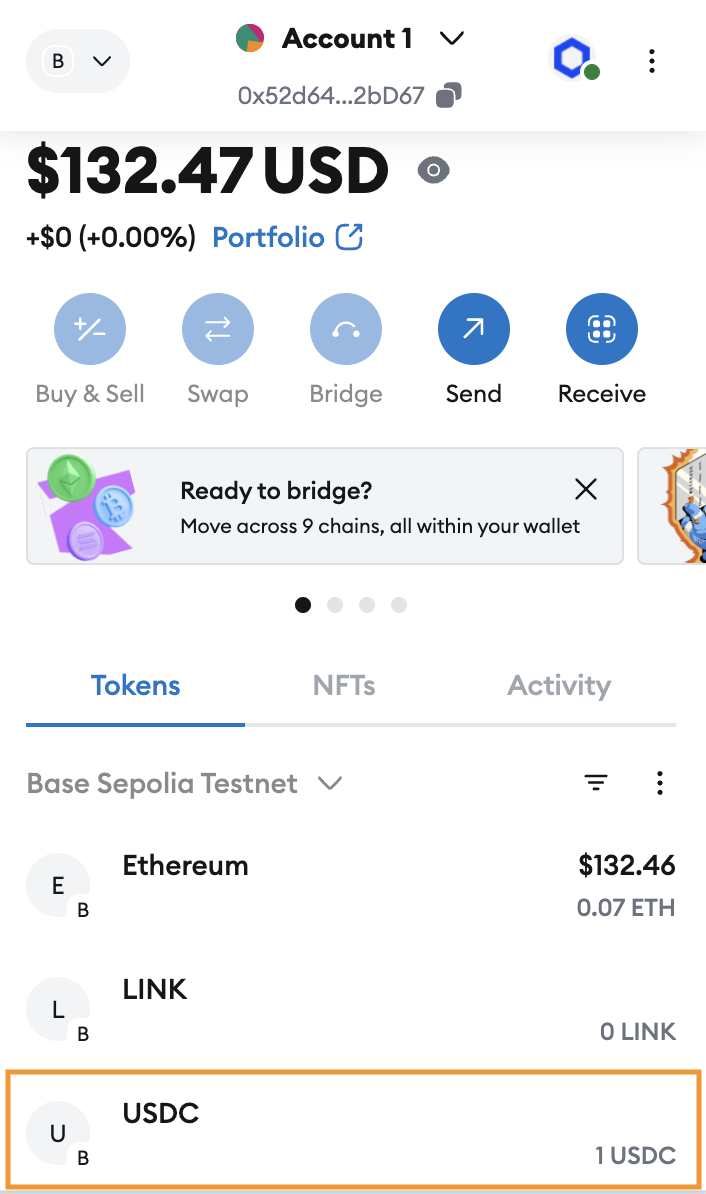 Awesome! You successfully sent your first cross-chain message to bridge tokens from Sepolia to Base Sepolia using CCIP integrated into a smart contract! ## Challenge! So now you know how to write a smart contract to bridge USDC tokens from Sepolia to Base Sepolia, the next challenge is to use this same smart contract to transfer [CCIP-BnM](https://sepolia.etherscan.io/token/0xfd57b4ddbf88a4e07ff4e34c487b99af2fe82a05#writeContract) tokens to ZKsync Sepolia! To do this you will need to: 1. Add the ZKsync Sepolia chain to MetaMask. 2. Add the CCIP-BnM token on Sepolia and ZKsync Sepolia to Metamask. 3. Modify and re-deploy the smart contract to Sepolia: - `DESTINATION_CHAIN_SELECTOR` to be the [selector for ZKsync Sepolia](https://docs.chain.link/ccip/directory/testnet/chain/ethereum-testnet-sepolia-zksync-1). - Change the token to be CCIP-BnM rather than USDC. - (devs-only): Can you moify the smart contracts to be adaptable for multiple chains by allowing the function caller to specify the token and destination chain? 4. Get some test CCIP tokens (CCIP-BnM) by [calling `drip()` on the token contract using Etherscan](https://sepolia.etherscan.io/token/0xfd57b4ddbf88a4e07ff4e34c487b99af2fe82a05#writeContract). 5. Call `transferTokens` as before and check the CCIP explorer to check the status of your cross-chain transfer. 6. Check your balance of ZKsync Sepolia CCIP-BnM tokens has now increased! If you do this, make sure to let us know on Twitter/X using [this link](https://twitter.com/intent/post?text=I%20just%20transferred%20tokens%20cross-chain%20using%20%40chainlink%20CCIP%20to%20%40zksync%20testnet!%20Thanks%20%40ciaranightingal%20and%20%40cyfrinupdraft!) to send the following message: "I just transferred tokens cross-chain using @chainlink CCIP to @zksync testnet! Thanks @ciaranightingal and @cyfrinupdraft!" See how easy it is to transfer your tokens cross-chain to ZKsync? Cool right!
Transferring Tokens Cross-chain in a Smart Contract Part 2
In the previous lesson, we wrote and deployed a smart contract to send USDC from Sepolia to Base Sepolia. In this lesson, we will perform that cross-chain transfer using Chainlink CCIP.
Funding the contract with LINK
To send tokens cross-chain, we need to fund our CCIPTokenSender function with LINK tokens to pay for the cross-chain transfer.
This is a recap of what you learned in Section 2, Lesson 3, so we are going to go pretty quickly. Revisit that lesson if you'd like a more detailed breakdown.
In MetaMask, click on the Tokens tab and click the LINK token:

Click the Send button:

For the Send to address, paste the address of the
CCIPTokenSendercontract we deployed in the previous lesson:

Enter the Amount of LINK to send to the contract.
3LINK will be sufficient.Click Continue:

Click Confirm to sign the transaction and send the LINK tokens to the
CCIPTokenSendercontract:

Check the contract balance
Let's check the LINK tokens successfully transferred to the CCIPTokenSender contract by checking its LINK balance. This tutorial uses Etherscan, but you can also use Blockscout or other block explorers.
Navigate to Etherscan Sepolia and search the LINK token address on Sepolia:
0x779877A7B0D9E8603169DdbD7836e478b4624789.Clic Connect to Web3 and connect MetaMask to Etherscan.
Click on the Contract tabs and then Read Contract and find the
balanceOffunctionFor the
account, enter theCCIPTokenSenderaddress:

If the transfer is successful, it will produce an output of 300000000000000, which is 3 LINK in WEI.
Approve CCIPTokenSender to spend USDC
When calling transferTokens, the function transfers tokens from the user (represented by msg.sender) to the CCIPTokenSender contract using the safeTransferFrom function, enabling those tokens to be sent cross-chain.
Before this can work, the user must first grant permission to the CCIPTokenSender contract to transfer their USDC tokens. This permission is given through an "approval" transaction on the USDC contract, which authorizes the CCIPTokenSender contract to spend a specific amount of the user's tokens on their behalf.
To do this token approval, we are going to interact with the USDC contract on Etherscan Sepolia, as we did the LINK token.
Navigate to Etherscan Sepolia and search the USDC token address on Sepolia:
0x1c7D4B196Cb0C7B01d743Fbc6116a902379C7238Click on the Contract tabs and then Write as Proxy, (Write since we want to send a transaction that modifies state and as Proxy since we want to be calling functions on the implementation contract, and this is a proxy. Don't worry about what this means - it's pretty advanced stuff).
Connect your wallet by clicking the Connect to Web3 button.
Find the
approvefunction and click on it to expand it.For the
spender, enter theCCIPTokenSenderaddress; for thevalue, enter the number of tokens you want to send cross-chain; we will be sending1 USDCor1000000since USDC has 6 decimal places:

Click Write to initiate the transaction.
Sign the transaction in MetaMask to send the transaction.
To confirm the approval was successful, click the Read as Proxy tab and click the
allowancefunction. Enter your address as theownerand theCCIPTokenSendercontract address as thespender. Then, click Query:

If the approval was successful, you will see an output of
1000000.
Executing the Cross-chain Transfer of USDC
Let's FINALLY send some USDC from Sepolia to Base Sepolia using CCIP!
-
Return to Remix and click the Deploy and run transactions tab.
-
Click on the
transferTokensfunction and fill out the following inputs:_receiver: paste your wallet address since you will send yourself USDC on the destination chain. Note that, on some blockchains, you are not guaranteed to have the same address._amount: we are sending1USDC cross-chain, so put1000000(USDC has 6 decimal places).

-
Click transact to initiate the transaction.
-
Sign the message in MetaMask by clicking Confirm.

In Remix, we will see a log in the terminal confirming the transfer has been initiated on Sepolia.

Copy the transaction hash! We will be using this shortly.
You have now successfully initiated a cross-chain transfer from Sepolia to Base Sepolia!
Now, we want to track the cross-chain message, see if the minting transaction has occurred on the destination chain, and when we received our bridged tokens. To do this, we will use the CCIP explorer.
Using the CCIP Explorer
After sending a transaction, you can access the CCIP Explorer to check the progression of the coss-chain message.
Paste the Sepolia transaction hash into the CCIP Explorer search bar:

This will bring up the transaction details for your cross-chain transfer. Here, you will be able to see an overview of the transaction, including the source and destination transactions to burn and mint the tokens, respectively.
It will also show the Status of the cross-chain message. The tokens are only received on the destination chain after full finality is reached on the source chain. For Ethereum Sepolia, this is approximately 20 minutes, but the times for different chains can be found in the Chainlink documentation.

When the message's status changes from Waiting for finality to Success, you will have received your tokens on the destination chain:

To check your USDC balance, switch your network inside MetaMask to Base Sepolia and then check your USDC balance in the Tokens tab (assuming you have imported the USDC token on Base Sepolia).

Awesome! You successfully sent your first cross-chain message to bridge tokens from Sepolia to Base Sepolia using CCIP integrated into a smart contract!
Challenge!
So now you know how to write a smart contract to bridge USDC tokens from Sepolia to Base Sepolia, the next challenge is to use this same smart contract to transfer CCIP-BnM tokens to ZKsync Sepolia!
To do this you will need to:
Add the ZKsync Sepolia chain to MetaMask.
Add the CCIP-BnM token on Sepolia and ZKsync Sepolia to Metamask.
Modify and re-deploy the smart contract to Sepolia:
DESTINATION_CHAIN_SELECTORto be the selector for ZKsync Sepolia.Change the token to be CCIP-BnM rather than USDC.
(devs-only): Can you moify the smart contracts to be adaptable for multiple chains by allowing the function caller to specify the token and destination chain?
Get some test CCIP tokens (CCIP-BnM) by calling
drip()on the token contract using Etherscan.Call
transferTokensas before and check the CCIP explorer to check the status of your cross-chain transfer.Check your balance of ZKsync Sepolia CCIP-BnM tokens has now increased!
If you do this, make sure to let us know on Twitter/X using this link to send the following message:
"I just transferred tokens cross-chain using @chainlink CCIP to @zksync testnet! Thanks @ciaranightingal and @cyfrinupdraft!"
See how easy it is to transfer your tokens cross-chain to ZKsync? Cool right!
Transferring Tokens Cross Chain With CCIP Part 2
A step-by-step walkthrough to Transferring Tokens Cross-chain in a Smart Contract Part 2 - Execute a USDC transfer from Sepolia to Base Sepolia using your deployed CCIP contract, covering LINK funding and token approval. Track the transaction via CCIP Explorer and tackle a ZKsync bridging challenge.

Course Overview
About the course
What you'll learn
Smart contract and Solidity fundamentals
Chainlink’s decentralized oracle network (DON)
Chainlink Data Feeds
Chainlink Data Streams
Chainlink Automation
Chainlink CCIP
Chainlink Functions
Verifiable Random Function (VRF)
Chainlink Proof of Reserve
Course Description
Who is this course for?
- Smart Contract Developers
- Solutions Architects
- Blockchain Engineers
- Web3 Developers
- Security Researchers
Potential Careers
Smart Contract Engineer
$100,000 - $150,000 (avg. salary)
DeFi Developer
$75,000 - $200,000 (avg. salary)
Web3 developer
$60,000 - $150,000 (avg. salary)
Web3 Developer Relations
$85,000 - $125,000 (avg. salary)
Smart Contract Auditor
$100,000 - $200,000 (avg. salary)
Security researcher
$49,999 - $120,000 (avg. salary)
Blockchain Financial Analyst
$100,000 - $150,000 (avg. salary)


Last updated on July 25, 2025

Certification: Chainlink Fundamentals
The Chainlink Fundamentals proficiency exam covers is designed to confirm your grasp of all key concepts and learnings presented in the course material. Exam takers will have 75 minutes to complete 50 questions and must score 30/50 to pass and earn a Certificate of Completion. Because course material is continually updated, The Chainlink Fundamentals Certificate of Completions expires after 1 year. To remain current, holders must re-take the exam and pass to confirm their current knowledge.

Course Overview
About the course
What you'll learn
Smart contract and Solidity fundamentals
Chainlink’s decentralized oracle network (DON)
Chainlink Data Feeds
Chainlink Data Streams
Chainlink Automation
Chainlink CCIP
Chainlink Functions
Verifiable Random Function (VRF)
Chainlink Proof of Reserve
Course Description
Who is this course for?
- Smart Contract Developers
- Solutions Architects
- Blockchain Engineers
- Web3 Developers
- Security Researchers
Potential Careers
Smart Contract Engineer
$100,000 - $150,000 (avg. salary)
DeFi Developer
$75,000 - $200,000 (avg. salary)
Web3 developer
$60,000 - $150,000 (avg. salary)
Web3 Developer Relations
$85,000 - $125,000 (avg. salary)
Smart Contract Auditor
$100,000 - $200,000 (avg. salary)
Security researcher
$49,999 - $120,000 (avg. salary)
Blockchain Financial Analyst
$100,000 - $150,000 (avg. salary)
Last updated on July 25, 2025