# Use Chainlink CCIP to Interact with Smart Contracts on Other Blockchains In the previous section, we learned how to bridge (or cross-chain transfer) tokens using CCIP. But what if, once we receive those tokens on the destination chain, we want to do something with them such as: - Staking the tokens - Buying an asset (another token, NFT, etc.) In this section, we will learn how to send arbitrary messages cross-chain using Chainlink CCIP _along with_ the tokens. In this message, we will encode an action to perform with the tokens upon transfer. ## What are cross-chain messages? Cross-chain messages are arbitrary data sent cross-chain as `bytes`. For example: - A string message, e.g., `"Hey there"` - An encoded function to call on a target contract on the destination chain, e.g., `abi.encodeWithSelector("mint(uint256)", 25)`. - A `uint256` representing a balance or exchange rate. ## Architecture and the Vault Let's create a cross-chain message that: 1. Sends USDC cross-chain from Sepolia to Base Sepolia. 2. Sends data cross-chain with the token. This data will be the encoded function call to deposit the tokens into a vault upon receiving them. For this, we will need three smart contracts: 1. A `Sender` contract that will - Encode a function call - Send the cross-chain message 3. A `Receiver` contract that will - Receive the tokens. - Call the function and contract encoded in the data. 4. A `Vault` contract for the `Receiver` to call to deposit the tokens. In reality, this will probably be some protocol you are interacting with. ### The Vault contract For this demo project, we need a simple `Vault` contract to deposit our tokens into once we receive them cross-chain. This contract is a placeholder for any application you want to interact with. This could be a staking protocol contract or something similar. For this reason, we will not walk through this contract and how it works since we will instead focus on code specific to implementing CCIP. All you need to know is that two functions exist: - `deposit`: to send USDC to the contract. - `withdraw`: to send the USDC back to your wallet. - Whilst still in your "CCIP" workspace, create a new folder in your `contracts` folder called `interfaces` and create a file called `IVault.sol` here. Paste the following code [from the course code repo](https://github.com/Cyfrin/chainlink-fundamentals-cu/blob/main/chainlink-course-code/ccip/interfaces/IVault.sol) into this file. The `Sender` contract will use this interface to know the `Vault` ABI, and we can construct the data to send cross-chain to include a call to `deposit`. - Create a new file in the `contracts` folder in your "CCIP" workspace called `Vault.sol` and copy-paste the `Vault.sol` contract code from the [course code repo](https://github.com/Cyfrin/chainlink-fundamentals-cu/blob/main/chainlink-course-code/ccip/Vault.sol). **Note**: this contract has been hard-coded to be deployed to Base Sepolia. #### Deploying the vault Compile and deploy this contract on the **destination chain** - Base Sepolia. Once it has been deployed, pin the contract to your workspace. Let's now create a `Sender` contract to send a cross-chain message with tokens. ## Sender contract The code for this contract is extremely similar to the contract in Section 5, Lesson 4. Create a new file in the `contracts` folder in your "CCIP" workspace called `Sender.sol`. In this file, add the code from the `Sender.sol` contract in the [course code repo](https://github.com/Cyfrin/chainlink-fundamentals-cu/blob/main/chainlink-course-code/ccip/Sender.sol). ### Code explainer We are not going to re-explain the code repeated from Section 5, only the changes or additions. ### The Cross-chain message The first thing that has changed is the contents of the cross-chain `Any2EVMMessage` struct. Let's go through these changes one by one. #### Message receiver and target **`tranferUSDC` arguments**: - `receiver`: Rather than hard-coding the `receiver` to be the `msg.sender`, we have made it dynamic. We need the `receiver` to be a `Receiver` contract deployed on the destination chain. This is because cross-chain messages that include `data` need to be a smart contract as **EOAs can only receive tokens**. We want to perform a function call using the data therefore, we need the `receiver` to be a smart contract. - `_amount`: As before, this is the number of tokens to transfer cross-chain. - `_target`: This is the contract that the we will encode in the data, that is sent cross-chain, to call a function on. Our `_target` contract will be the `Vault` contract which has a function called `deposit` that the `Receiver` contract will call using the data. ```solidity function transferTokens( address _receiver, uint256 _amount, address _target ) external returns (bytes32 messageId) {} ``` Then, we pass this `_receiver` as the `receiver` in the message struct: ```solidity Client.EVM2AnyMessage memory message = Client.EVM2AnyMessage({ receiver: abi.encode(_receiver), // Address of the Receiver contract (abi encoded since the receiver is of type bytes) data: abi.encode( _target, depositFunctionCalldata ), tokenAmounts: tokenAmounts, extraArgs: Client._argsToBytes( Client.EVMExtraArgsV1({gasLimit: 200000}) ), feeToken: address(LINK_TOKEN) }); ``` #### Message data In the `data` we send cross-chain, we need to encode: 1. `_depositFunctionCalldata`The function selector for the function we are going to be calling using the data. A function selector is just a hash of the function signature (the function name and arguments). We want to call `deposit` so we encode its signature and parameters, so the `Receiver` can call the function. 2. `_target`: The `Vault` address is on which to call `deposit`. First, we create the encoded function call using `abi.encodeWithSelector`: ```solidity bytes memory depositFunctionCalldata = abi.encodeWithSelector( IVault.deposit.selector, msg.sender, _amount ); ``` This allows us to call `deposit` on a contract that implements the `IVault` interface and passes `_amount` as a parameter to the function call. **Note**: We have hard-coded this to deposit from the EOA associated with the `msg.sender` address on the destination chain. Make sure that whatever address is calling `transferTokens` on the source chain has an associated address on the destination chain. Alternatively, pass a `_depositor` address as a parameter to the function to make this dynamic. Then, when we initialize the message struct, we encode this `depositFunctionCalldata` with the target contract address `_target` we passed as a function argument. ```solidity Client.EVM2AnyMessage memory message = Client.EVM2AnyMessage({ receiver: abi.encode(_receiver), data: abi.encode( _target, // Address of the target contract depositFunctionCalldata ),// Encode the function selector and the arguments of the stake function tokenAmounts: tokenAmounts, extraArgs: Client._argsToBytes( Client.EVMExtraArgsV1({gasLimit: 200000}) ), feeToken: address(LINK_TOKEN) }); ``` #### Gas fees The final thing that has been modified is the `gasLimit`. This gas limit is used when executing the receiving function on the `Receiver` contract. This will make more sense when we write the `Receiver` contract, but essentially, when CCIP executes the cross-chain transfer, it calls a function implemented on the `receiver` contract called `_ccipReceive`. This function needs gas to be executed by CCIP. This is where we are specifying this gas limit. Remeber, the `gasLimit` is always referring to the maximum gas you’re authorising to be used on the destination chain. ```solidity Client.EVM2AnyMessage memory message = Client.EVM2AnyMessage({ receiver: abi.encode(_receiver), data: abi.encode( _target, depositFunctionCalldata ), tokenAmounts: tokenAmounts, extraArgs: Client._argsToBytes( Client.EVMExtraArgsV1({gasLimit: 200000}) // we need a gas limit to call the receive function ), feeToken: address(LINK_TOKEN) }); ``` The [Chainlink CCIP documentation](https://docs.chain.link/ccip/best-practices#setting-gaslimit) provides more information on estimating the `gasLimit`. ## Compile and Deploy the contract Make sure you are connected to Sepolia inside MetaMask, compile the `Sender` contract, and deploy it to Sepolia. Remember to pin it to your workspace! This is crucial since we will be switching back and forth between networks. Once the `Sender` contract has been successfully deployed AND pinned, note down this address. You'll be switching back and forth between chains, so it'll be useful to be able to easily copy it. Switch the connected network to Base Sepolia inside MetaMask by clicking the network dropdown on the top left: 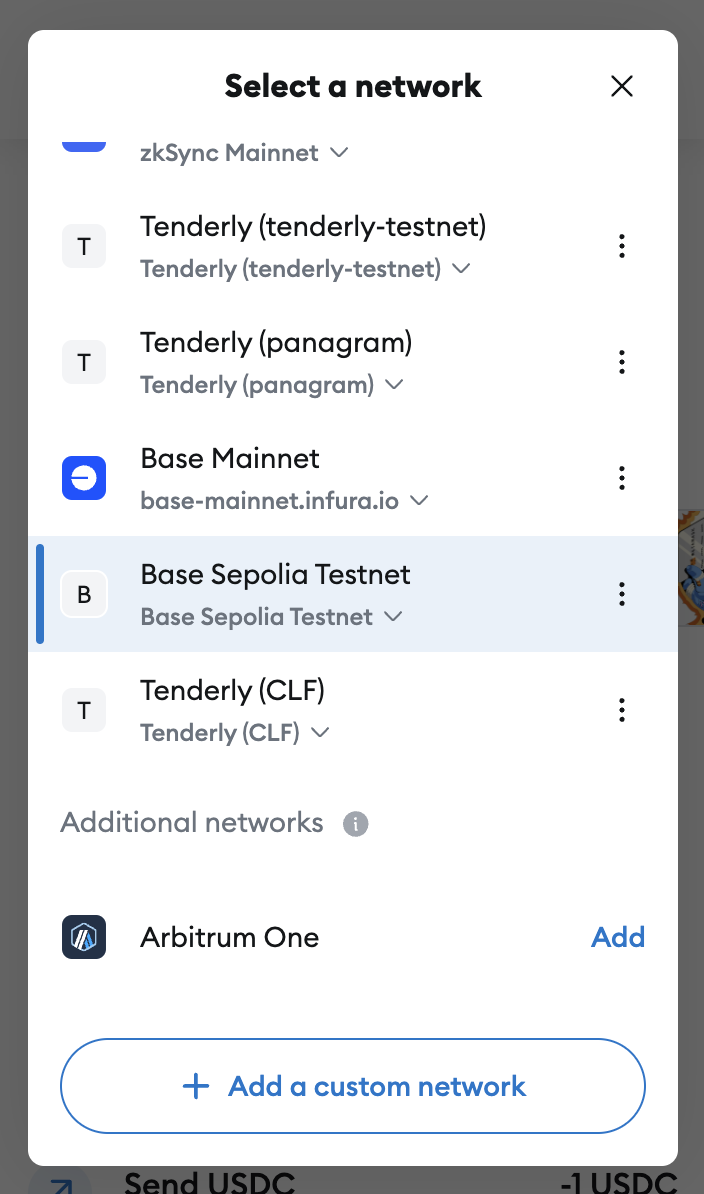 Verify in Remix that you are connected to Base Sepolia by checking that the network has a chain ID of `84532`. 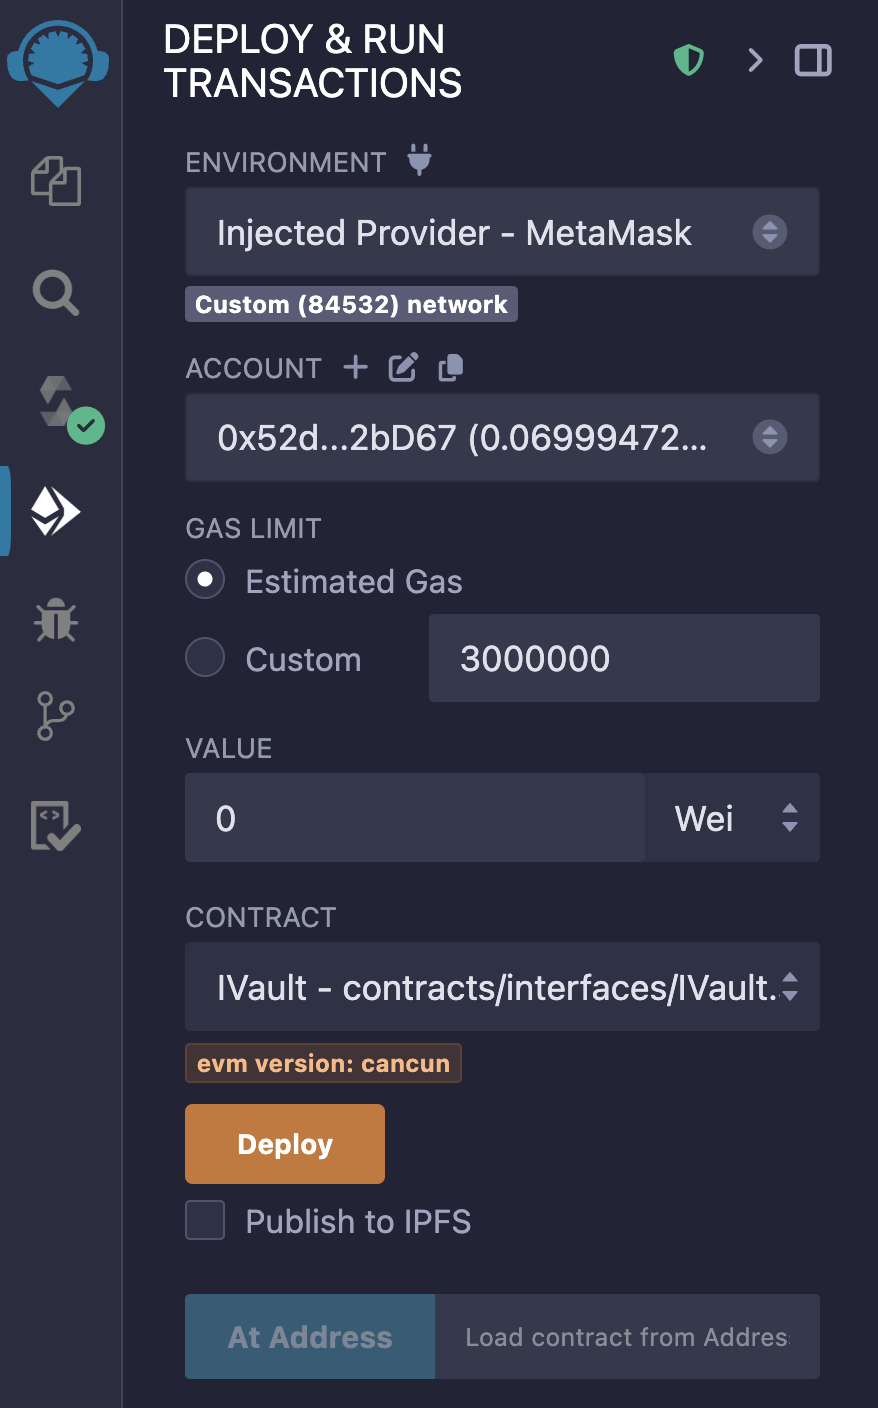 Now, deploy the `Vault` to Base Sepolia AND pin it to your workspace once it has deployed. Again, note down this address so you can easily copy it without having to switch back to Base Sepolia. Now, we are ready to write and deploy the `Receiver` contract before sending our cross-chain message!
Use Chainlink CCIP to Interact with Smart Contracts on Other Blockchains
In the previous section, we learned how to bridge (or cross-chain transfer) tokens using CCIP. But what if, once we receive those tokens on the destination chain, we want to do something with them such as:
Staking the tokens
Buying an asset (another token, NFT, etc.)
In this section, we will learn how to send arbitrary messages cross-chain using Chainlink CCIP along with the tokens. In this message, we will encode an action to perform with the tokens upon transfer.
What are cross-chain messages?
Cross-chain messages are arbitrary data sent cross-chain as bytes. For example:
A string message, e.g.,
"Hey there"An encoded function to call on a target contract on the destination chain, e.g.,
abi.encodeWithSelector("mint(uint256)", 25).A
uint256representing a balance or exchange rate.
Architecture and the Vault
Let's create a cross-chain message that:
Sends USDC cross-chain from Sepolia to Base Sepolia.
Sends data cross-chain with the token. This data will be the encoded function call to deposit the tokens into a vault upon receiving them.
For this, we will need three smart contracts:
A
Sendercontract that willEncode a function call
Send the cross-chain message
A
Receivercontract that willReceive the tokens.
Call the function and contract encoded in the data.
A
Vaultcontract for theReceiverto call to deposit the tokens. In reality, this will probably be some protocol you are interacting with.
The Vault contract
For this demo project, we need a simple Vault contract to deposit our tokens into once we receive them cross-chain. This contract is a placeholder for any application you want to interact with. This could be a staking protocol contract or something similar. For this reason, we will not walk through this contract and how it works since we will instead focus on code specific to implementing CCIP. All you need to know is that two functions exist:
-
deposit: to send USDC to the contract. -
withdraw: to send the USDC back to your wallet. -
Whilst still in your "CCIP" workspace, create a new folder in your
contractsfolder calledinterfacesand create a file calledIVault.solhere. Paste the following code from the course code repo into this file.
The Sender contract will use this interface to know the Vault ABI, and we can construct the data to send cross-chain to include a call to deposit.
Create a new file in the
contractsfolder in your "CCIP" workspace calledVault.soland copy-paste theVault.solcontract code from the course code repo.
Note: this contract has been hard-coded to be deployed to Base Sepolia.
Deploying the vault
Compile and deploy this contract on the destination chain - Base Sepolia.
Once it has been deployed, pin the contract to your workspace.
Let's now create a Sender contract to send a cross-chain message with tokens.
Sender contract
The code for this contract is extremely similar to the contract in Section 5, Lesson 4.
Create a new file in the contracts folder in your "CCIP" workspace called Sender.sol. In this file, add the code from the Sender.sol contract in the course code repo.
Code explainer
We are not going to re-explain the code repeated from Section 5, only the changes or additions.
The Cross-chain message
The first thing that has changed is the contents of the cross-chain Any2EVMMessage struct. Let's go through these changes one by one.
Message receiver and target
tranferUSDC arguments:
receiver: Rather than hard-coding thereceiverto be themsg.sender, we have made it dynamic. We need thereceiverto be aReceivercontract deployed on the destination chain. This is because cross-chain messages that includedataneed to be a smart contract as EOAs can only receive tokens. We want to perform a function call using the data therefore, we need thereceiverto be a smart contract._amount: As before, this is the number of tokens to transfer cross-chain._target: This is the contract that the we will encode in the data, that is sent cross-chain, to call a function on. Our_targetcontract will be theVaultcontract which has a function calleddepositthat theReceivercontract will call using the data.
Then, we pass this _receiver as the receiver in the message struct:
Message data
In the data we send cross-chain, we need to encode:
_depositFunctionCalldataThe function selector for the function we are going to be calling using the data. A function selector is just a hash of the function signature (the function name and arguments). We want to calldepositso we encode its signature and parameters, so theReceivercan call the function._target: TheVaultaddress is on which to calldeposit.
First, we create the encoded function call using abi.encodeWithSelector:
This allows us to call deposit on a contract that implements the IVault interface and passes _amount as a parameter to the function call.
Note: We have hard-coded this to deposit from the EOA associated with the msg.sender address on the destination chain. Make sure that whatever address is calling transferTokens on the source chain has an associated address on the destination chain. Alternatively, pass a _depositor address as a parameter to the function to make this dynamic.
Then, when we initialize the message struct, we encode this depositFunctionCalldata with the target contract address _target we passed as a function argument.
Gas fees
The final thing that has been modified is the gasLimit. This gas limit is used when executing the receiving function on the Receiver contract. This will make more sense when we write the Receiver contract, but essentially, when CCIP executes the cross-chain transfer, it calls a function implemented on the receiver contract called _ccipReceive. This function needs gas to be executed by CCIP. This is where we are specifying this gas limit. Remeber, the gasLimit is always referring to the maximum gas you’re authorising to be used on the destination chain.
The Chainlink CCIP documentation provides more information on estimating the gasLimit.
Compile and Deploy the contract
Make sure you are connected to Sepolia inside MetaMask, compile the Sender contract, and deploy it to Sepolia.
Remember to pin it to your workspace! This is crucial since we will be switching back and forth between networks.
Once the Sender contract has been successfully deployed AND pinned, note down this address. You'll be switching back and forth between chains, so it'll be useful to be able to easily copy it.
Switch the connected network to Base Sepolia inside MetaMask by clicking the network dropdown on the top left:

Verify in Remix that you are connected to Base Sepolia by checking that the network has a chain ID of 84532.

Now, deploy the Vault to Base Sepolia AND pin it to your workspace once it has deployed. Again, note down this address so you can easily copy it without having to switch back to Base Sepolia.
Now, we are ready to write and deploy the Receiver contract before sending our cross-chain message!
Cross Chain Messages
A detailed walkthrough to Use Chainlink CCIP to Interact with Smart Contracts on Other Blockchains - Master sending tokens and arbitrary data cross-chain with CCIP, focusing on encoding function calls and deploying Sender/Vault contracts.

Course Overview
About the course
What you'll learn
Smart contract and Solidity fundamentals
Chainlink’s decentralized oracle network (DON)
Chainlink Data Feeds
Chainlink Data Streams
Chainlink Automation
Chainlink CCIP
Chainlink Functions
Verifiable Random Function (VRF)
Chainlink Proof of Reserve
Course Description
Who is this course for?
- Smart Contract Developers
- Solutions Architects
- Blockchain Engineers
- Web3 Developers
- Security Researchers
Potential Careers
Smart Contract Engineer
$100,000 - $150,000 (avg. salary)
DeFi Developer
$75,000 - $200,000 (avg. salary)
Web3 developer
$60,000 - $150,000 (avg. salary)
Web3 Developer Relations
$85,000 - $125,000 (avg. salary)
Smart Contract Auditor
$100,000 - $200,000 (avg. salary)
Security researcher
$49,999 - $120,000 (avg. salary)
Blockchain Financial Analyst
$100,000 - $150,000 (avg. salary)


Last updated on July 25, 2025

Certification: Chainlink Fundamentals
The Chainlink Fundamentals proficiency exam covers is designed to confirm your grasp of all key concepts and learnings presented in the course material. Exam takers will have 75 minutes to complete 50 questions and must score 30/50 to pass and earn a Certificate of Completion. Because course material is continually updated, The Chainlink Fundamentals Certificate of Completions expires after 1 year. To remain current, holders must re-take the exam and pass to confirm their current knowledge.

Course Overview
About the course
What you'll learn
Smart contract and Solidity fundamentals
Chainlink’s decentralized oracle network (DON)
Chainlink Data Feeds
Chainlink Data Streams
Chainlink Automation
Chainlink CCIP
Chainlink Functions
Verifiable Random Function (VRF)
Chainlink Proof of Reserve
Course Description
Who is this course for?
- Smart Contract Developers
- Solutions Architects
- Blockchain Engineers
- Web3 Developers
- Security Researchers
Potential Careers
Smart Contract Engineer
$100,000 - $150,000 (avg. salary)
DeFi Developer
$75,000 - $200,000 (avg. salary)
Web3 developer
$60,000 - $150,000 (avg. salary)
Web3 Developer Relations
$85,000 - $125,000 (avg. salary)
Smart Contract Auditor
$100,000 - $200,000 (avg. salary)
Security researcher
$49,999 - $120,000 (avg. salary)
Blockchain Financial Analyst
$100,000 - $150,000 (avg. salary)
Last updated on July 25, 2025