# Testnet Funds In this course, we will use Chainlink's services in smart contracts. We will deploy and interact with these contracts on testnets. Usually, this will be Sepolia, but in some instances, we will also use Base Sepolia. ## Using a faucet In the [Blockchain Basics course](https://updraft.cyfrin.io/courses/blockchain-basics), we covered using a faucet to get testnet Sepolia ETH to pay gas fees. Let's go over this again quickly to obtain LINK tokens so that you are all set for the rest of this course. ### Testnet LINK In addition to native tokens, we will also need to obtain some testnet LINK. LINK is the token used by Chainlink to pay the service providers when you are using the Chainlink services. Let's walk through how to get some testnet LINK, how to add LINK to MetaMask and how to send your tokens to another address (for example, if you wanted to fund a smart contract with LINK–spoiler alert, we will be doing this!) #### Adding LINK to Metamask - Head to the [Chainlink documentation](https://docs.chain.link/resources/link-token-contracts) and scroll down to the chain you want to use LINK on. E.g. [Sepolia Testnet](https://docs.chain.link/resources/link-token-contracts#sepolia-testnet) - Click the **Add to wallet** button to import the LINK token to NetaMask. Note that this will only add the token for that specific network. This will need to be repeated for all networks you intend to use LINK tokens. 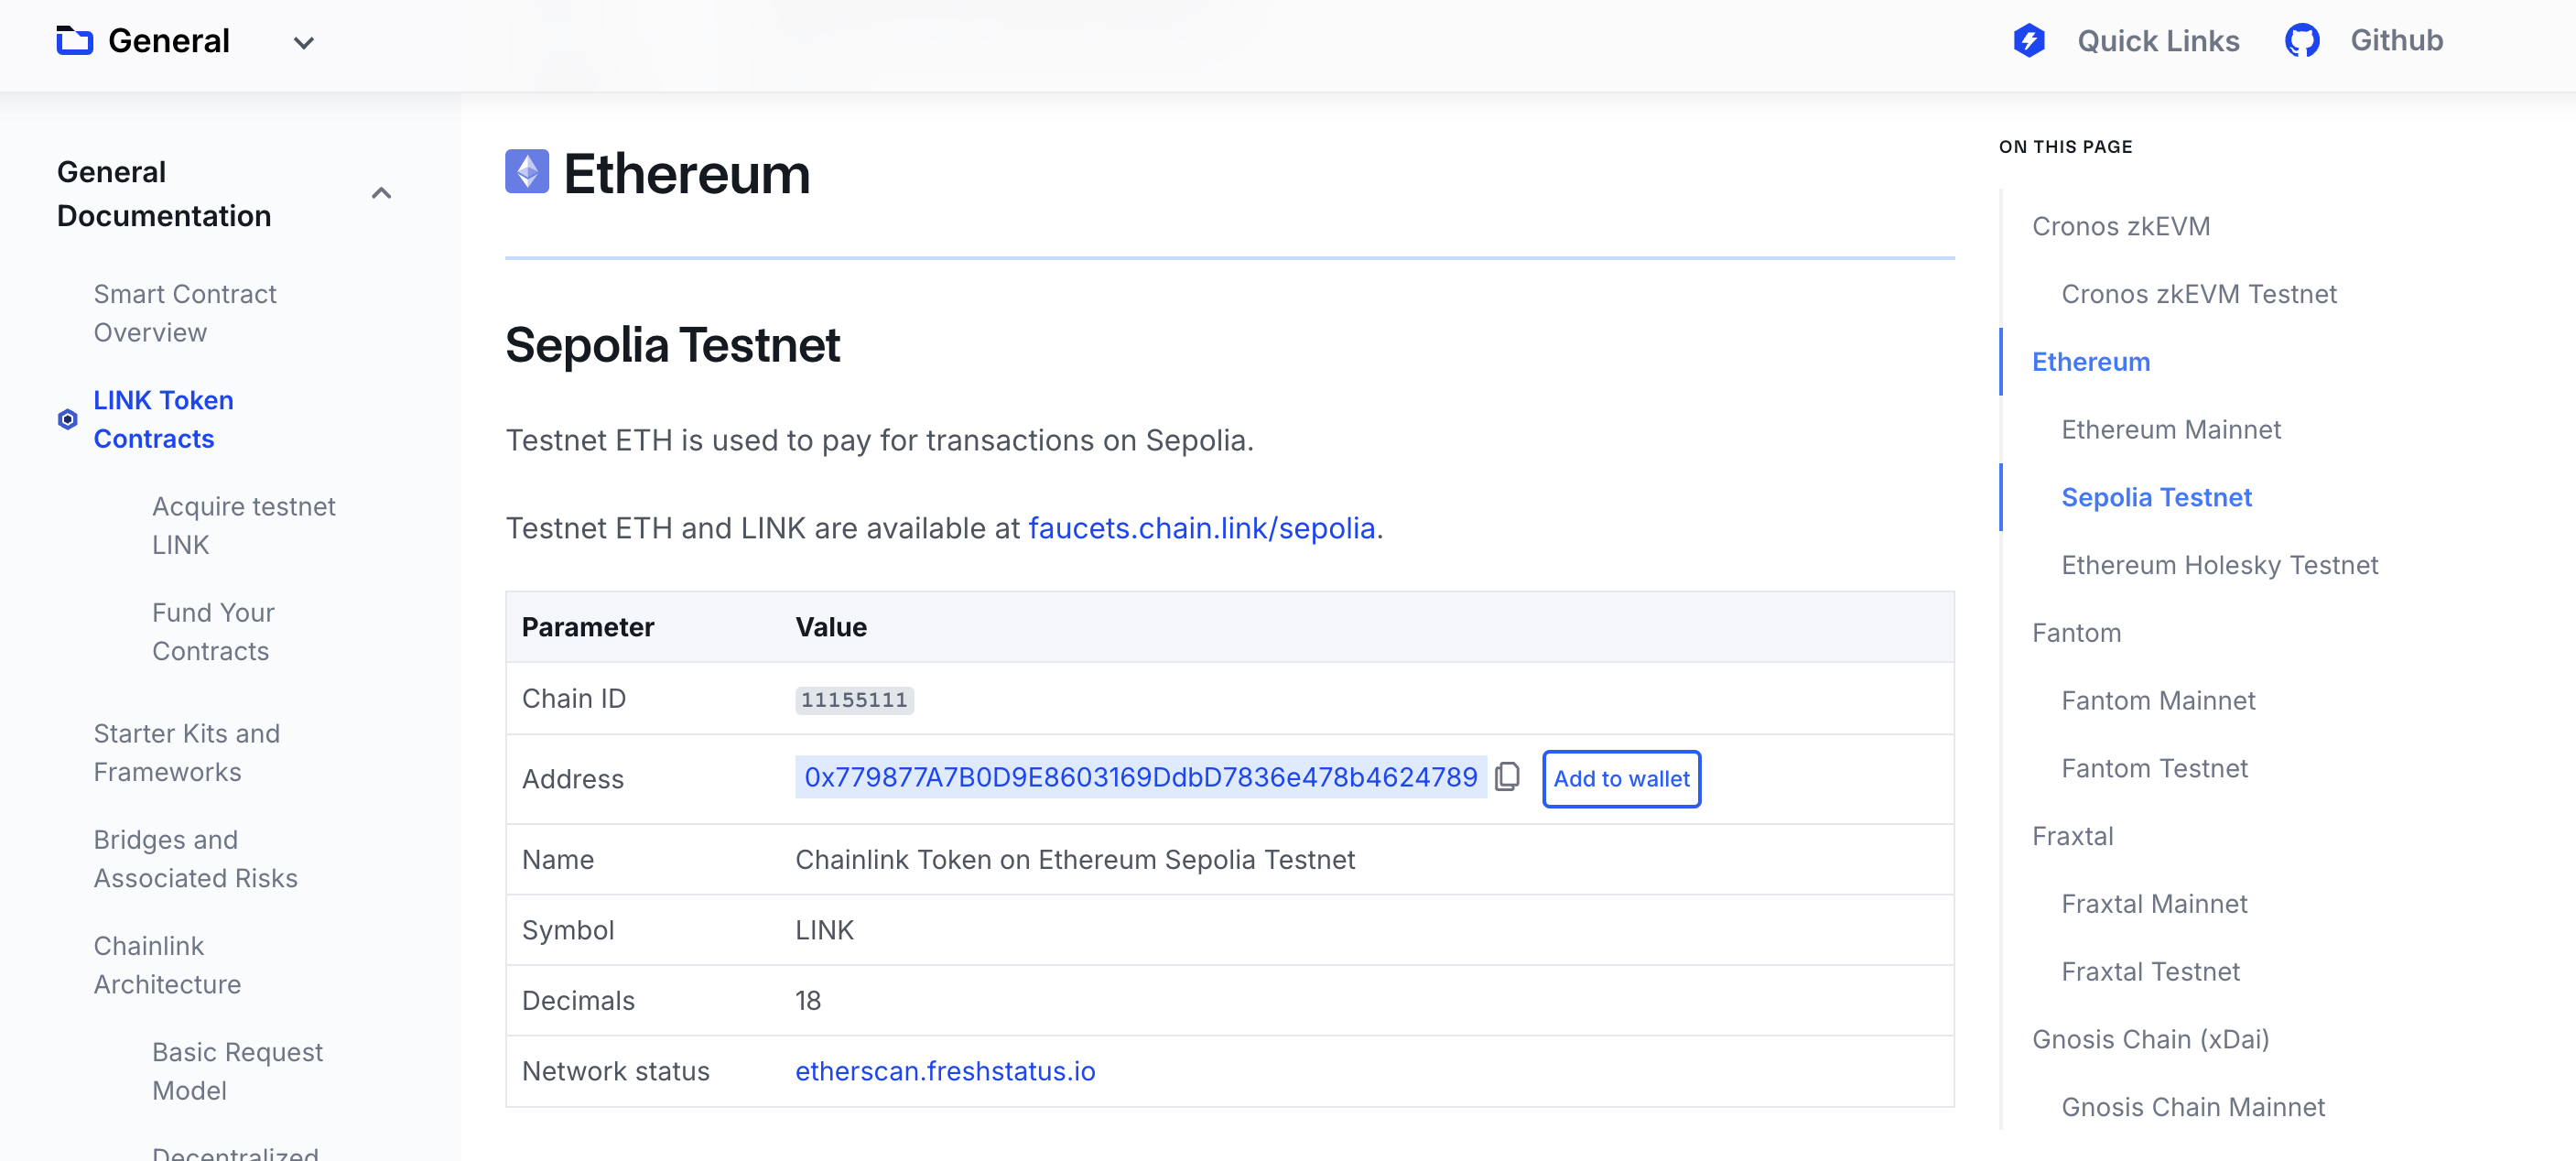 - Click **Add token** to add the token to your MetaMask 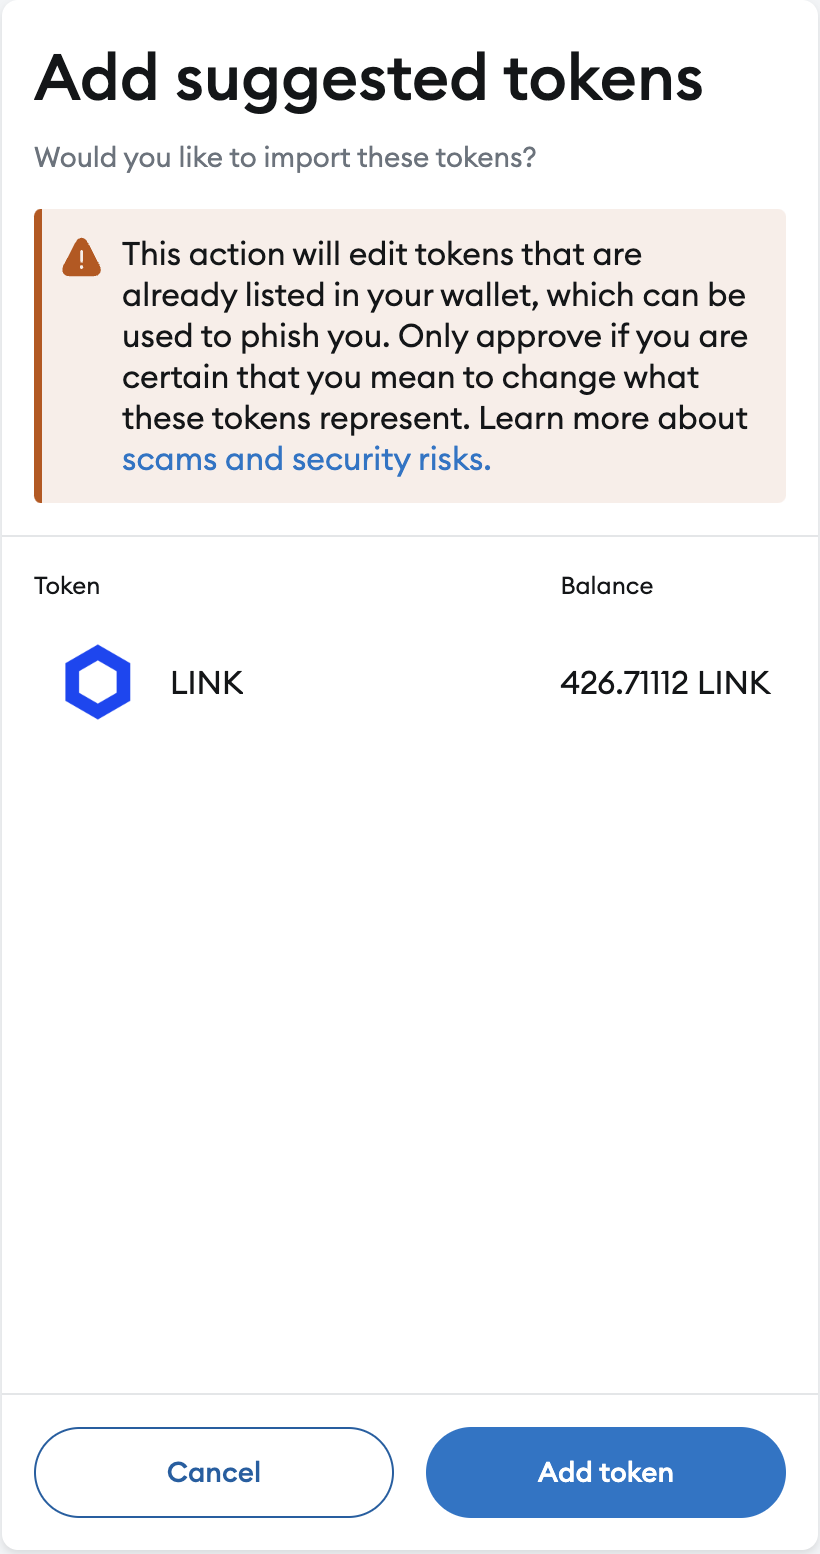 #### Using a LINK faucet To obtain testnet LINK, head to the [Chainlink Faucet](https://faucets.chain.link/) page. Here, you will find a list of all supported networks. Click the **Link** button at the top right, select the network(s) you want to get LINK on and click **Continue. " 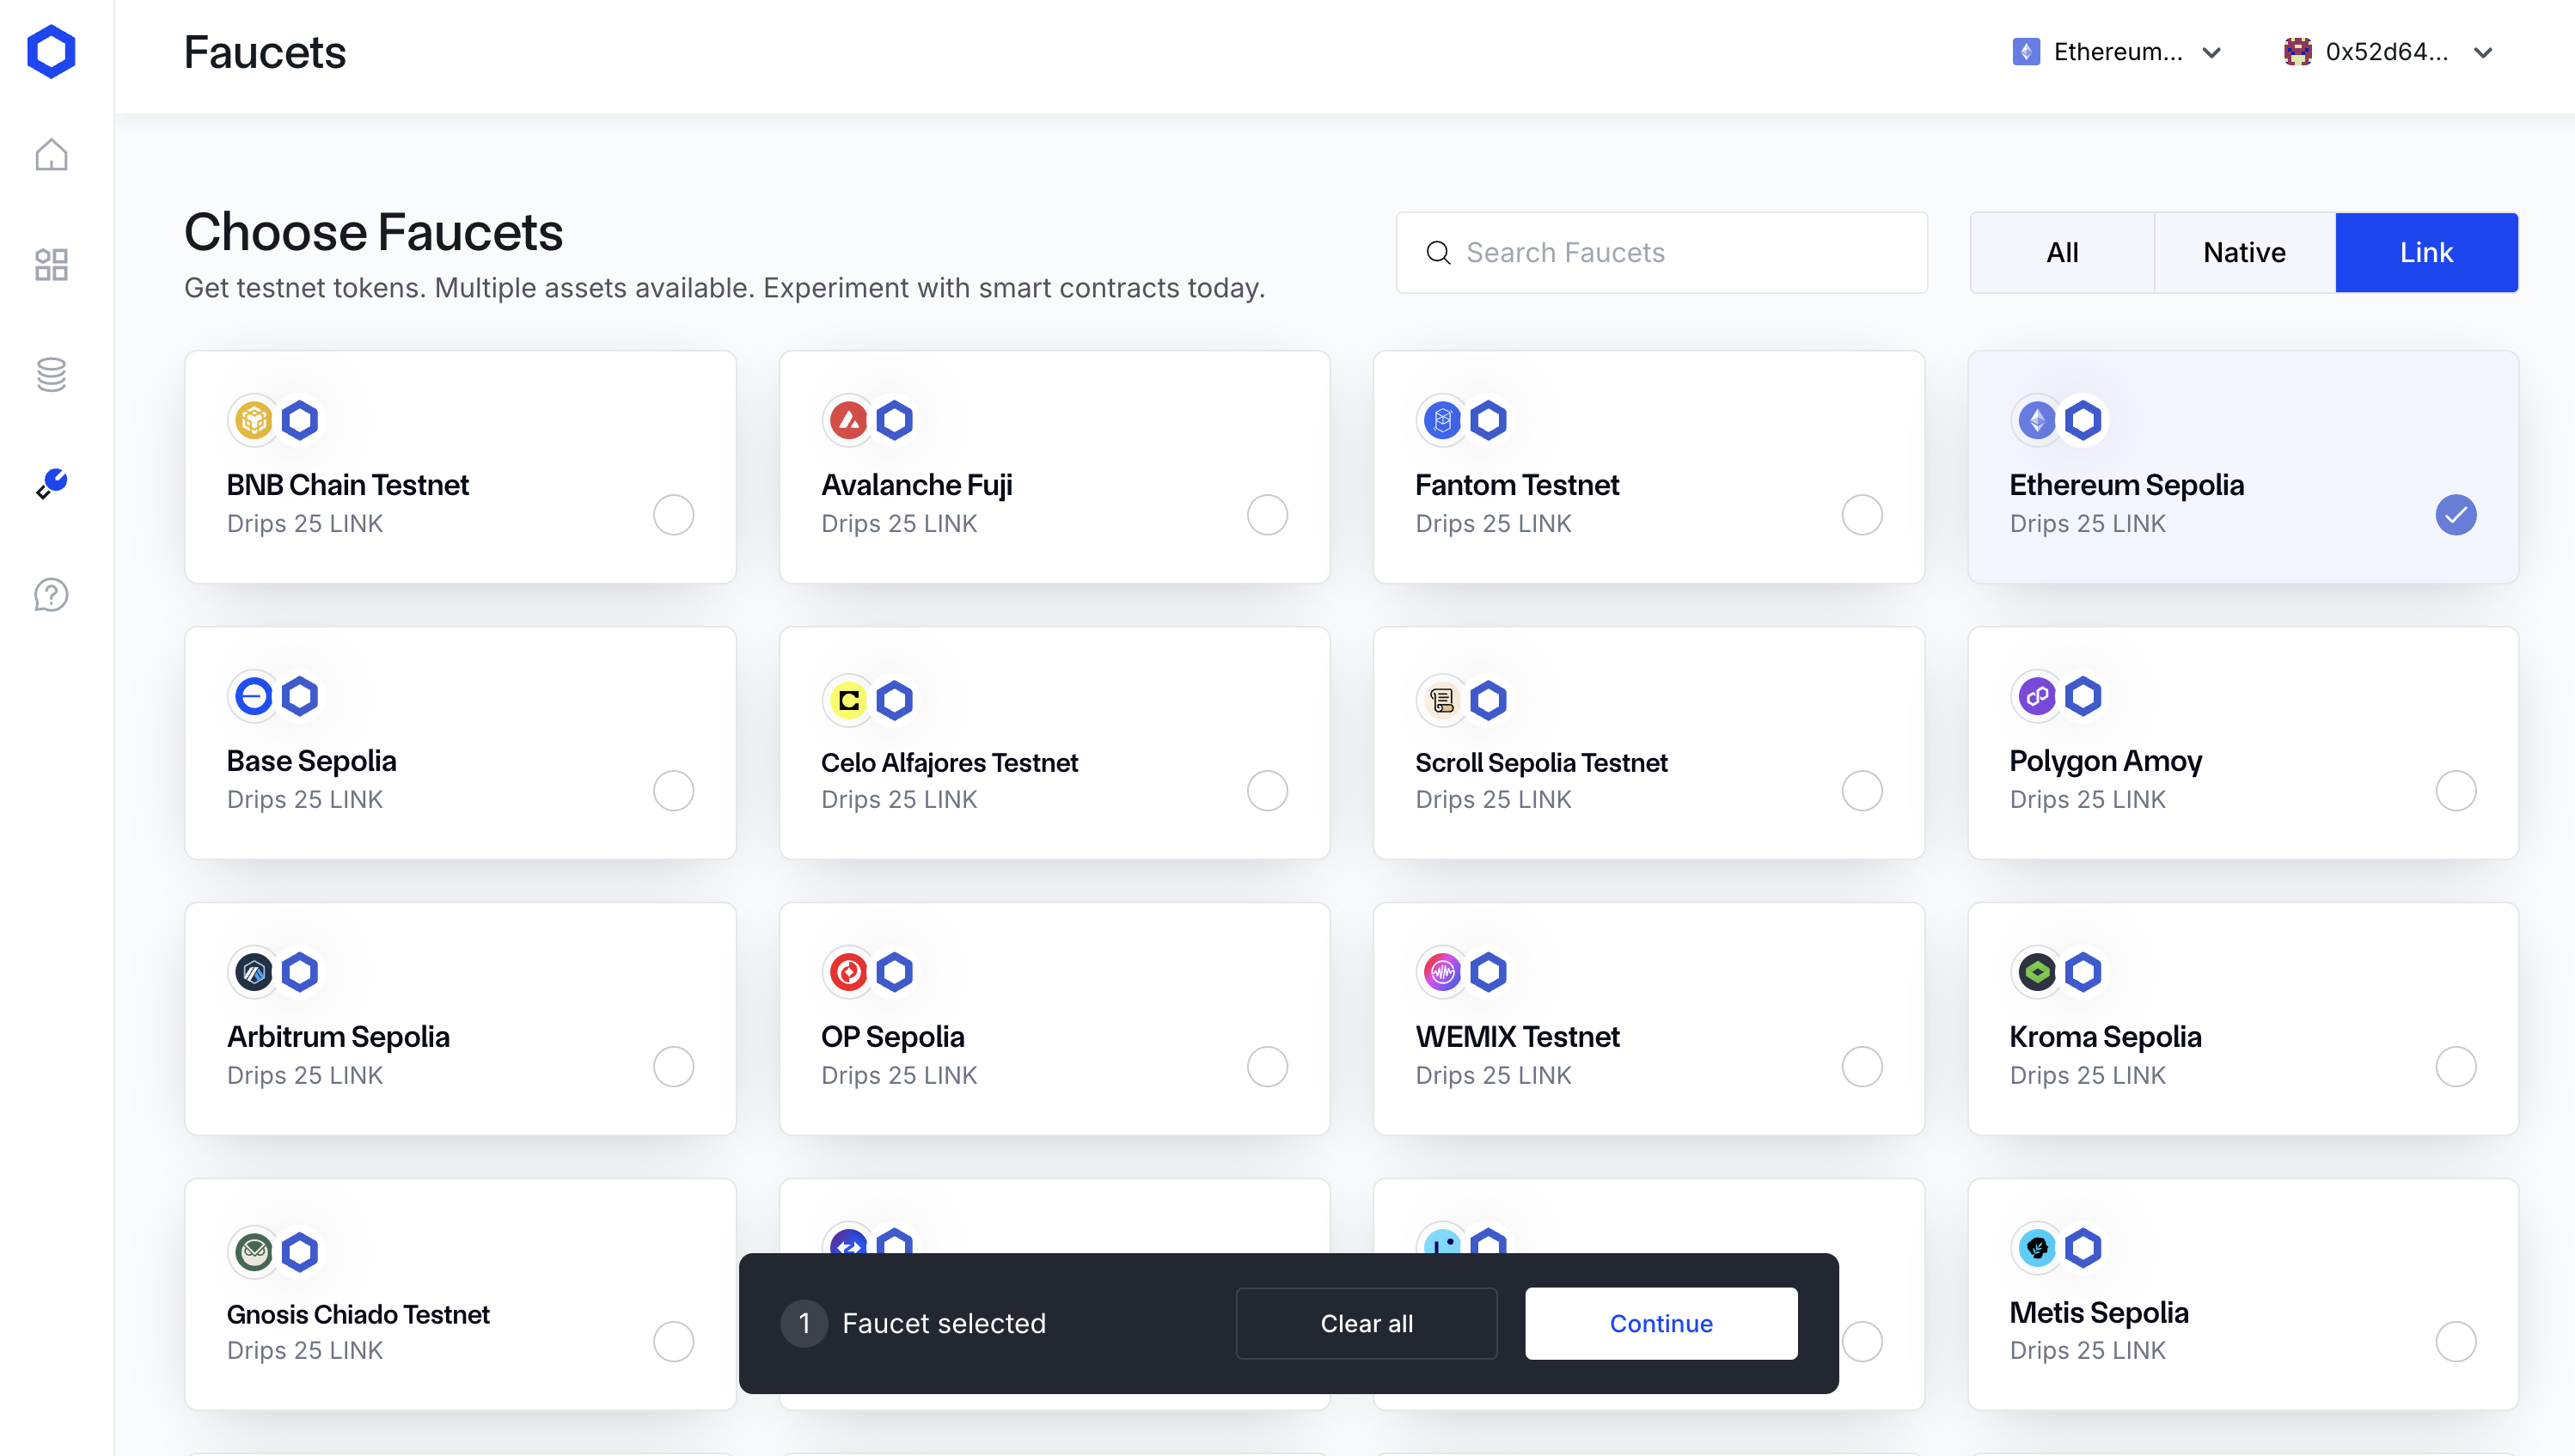 - Click **Get tokens** and click **Confirm** in MetaMask to sign the transaction. - Once the transaction has confirmed, you can see the LINK balance in your wallet.  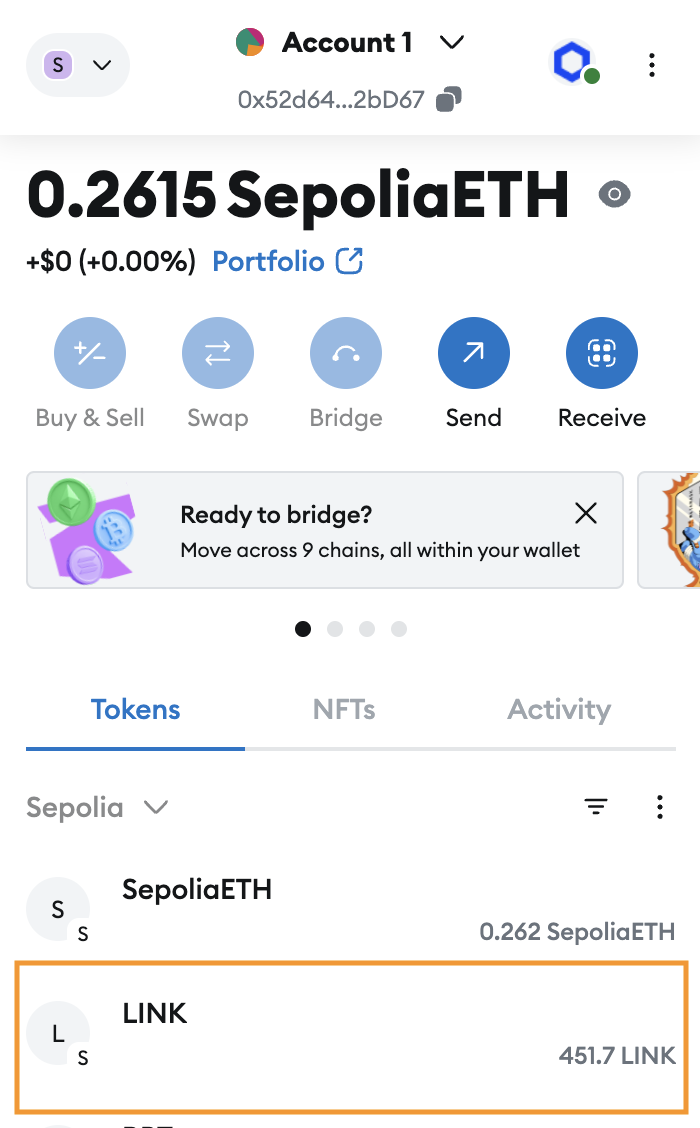 ### Adding a token to MetaMask LINK was easy to add to MetaMask since Chainlink included that cheeky **Add to wallet** button. But how do we add other tokens, such as USDC to MetaMask? - Find the token address. For USDC, for example, we can head to the [Circle documentation](https://developers.circle.com/stablecoins/usdc-contract-addresses#testnet) to find the address of the USDC contract on different chains. Copy the address for the USDC token on the chain you are working on. - Open MetaMask and check you are on the same chain as the token address you just copied by clicking on the network button on the top left corner in MetMask 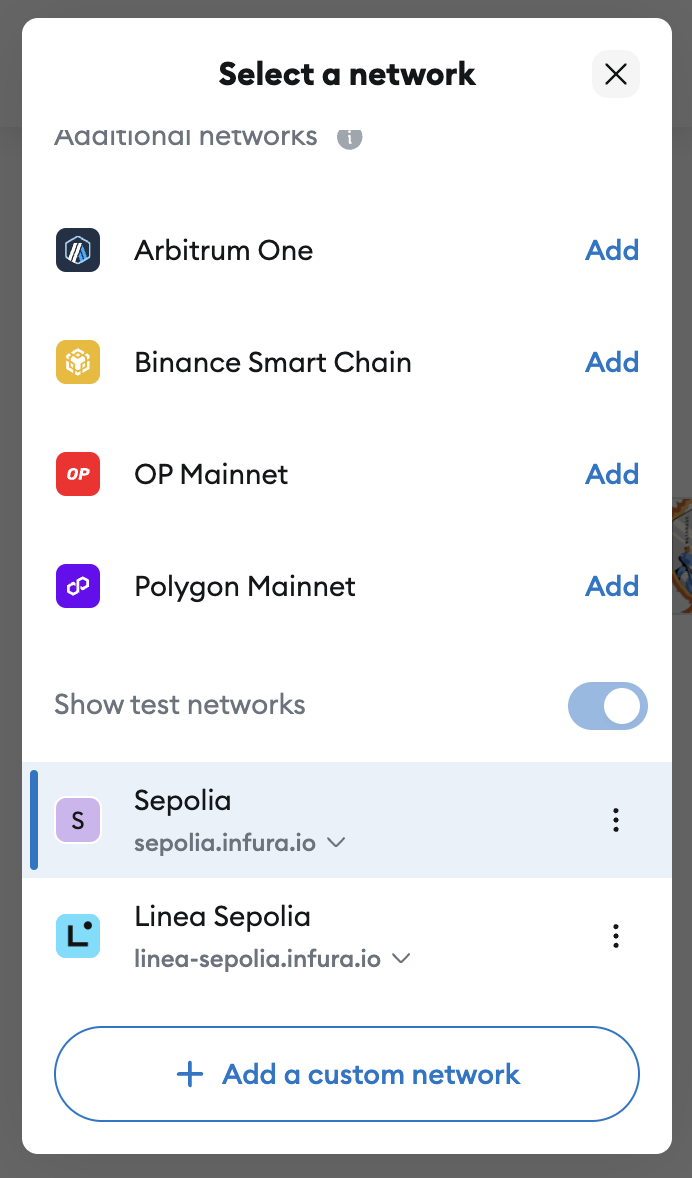 - Click the **Tokens** tab, click the vertical three dots button, and then **Import tokens** 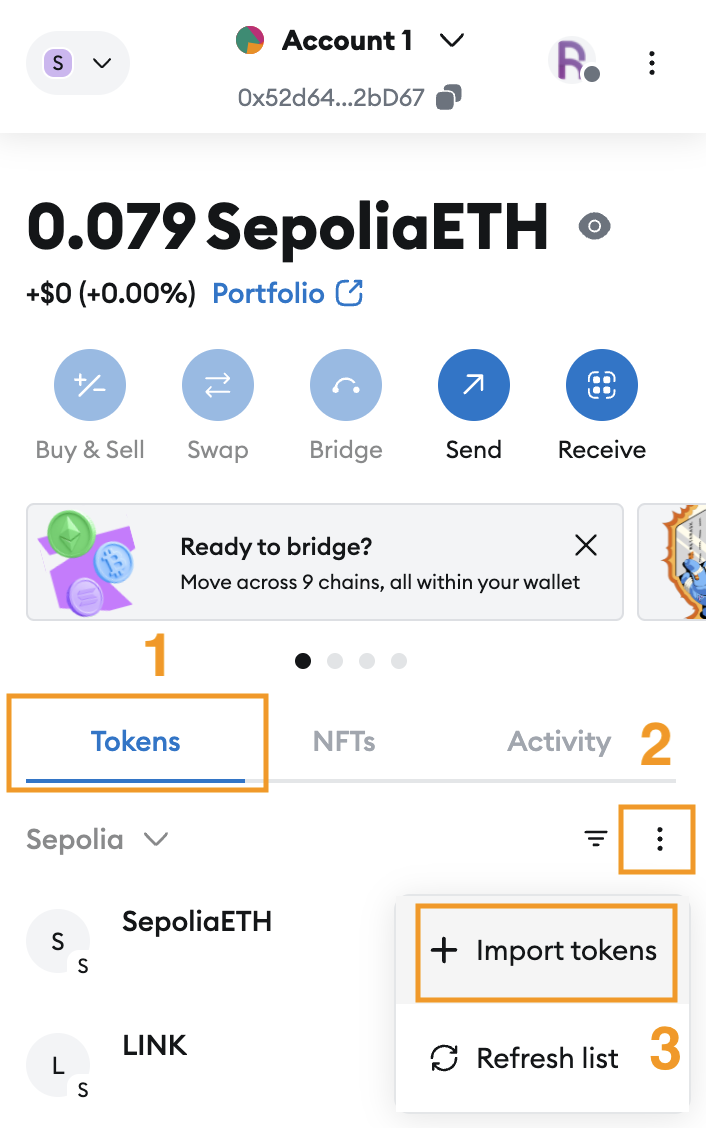 - Enter the token contract address. MetaMask will automatically detect your token and its related information if it follows the ERC-20 standard. - Check the correct information (Address, Token Symbol, and Decimals). 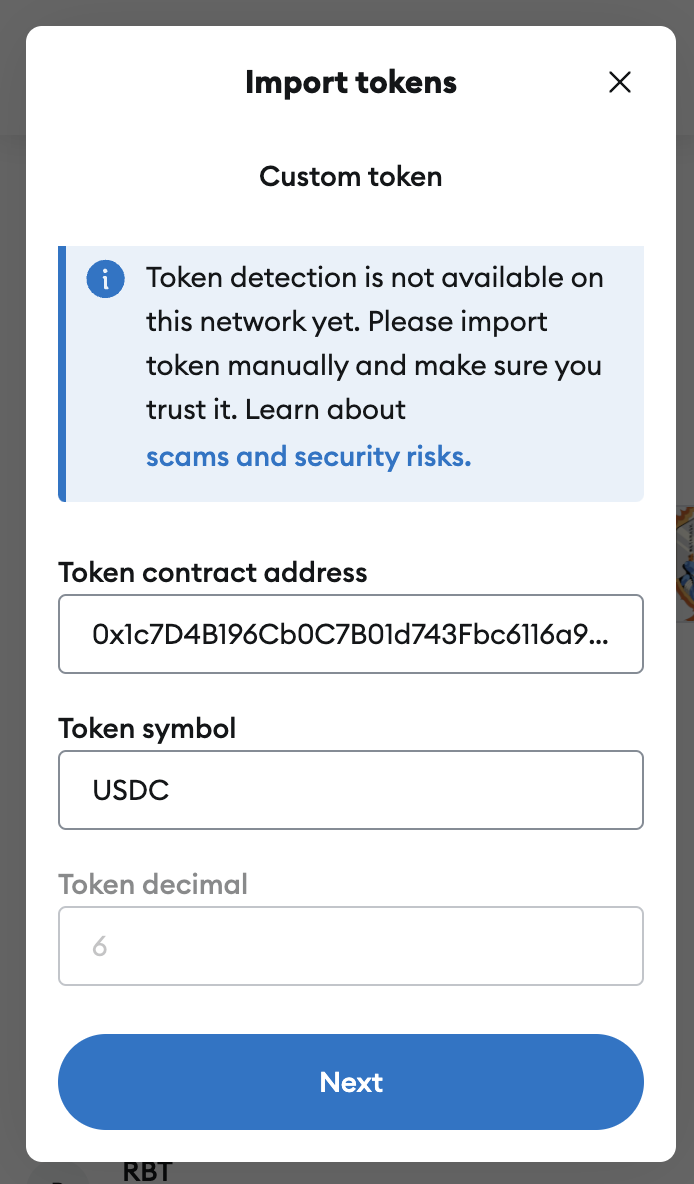 - Click **Next** to confirm the information. Click **Import** to import your token to MetaMask. This lets you view your balance and send tokens to others using the MetaMask UI. ### Sending tokens to another address To send tokens to another address: - Click on the **Tokens** tab, then click the token you want to send (you need to have imported it already), e.g., the LINK token. 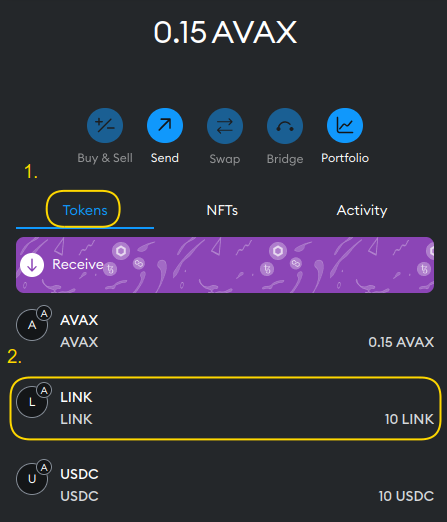 - Click the **Send** button. 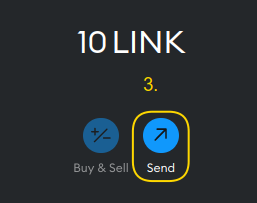 - Paste the address you want to send the tokens to. 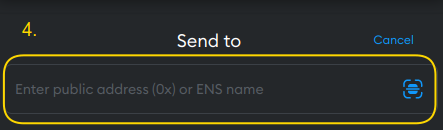 - Enter the amount and then click **Next** 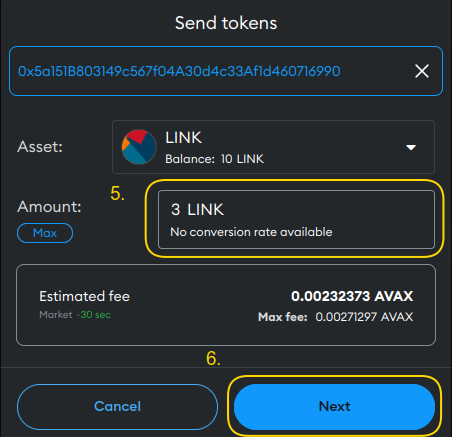 - To sign the transaction, click **Confirm**. This transaction will now be sent and the tokens will be transferred to the address you specified. 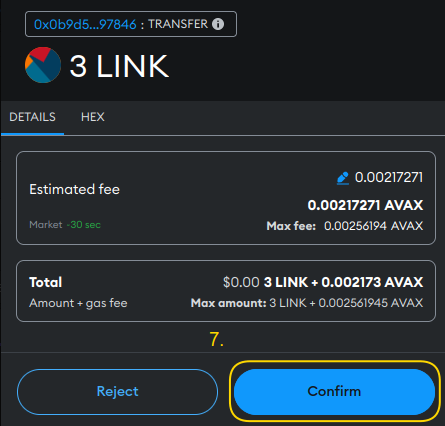
Testnet Funds
In this course, we will use Chainlink's services in smart contracts. We will deploy and interact with these contracts on testnets. Usually, this will be Sepolia, but in some instances, we will also use Base Sepolia.
Using a faucet
In the Blockchain Basics course, we covered using a faucet to get testnet Sepolia ETH to pay gas fees. Let's go over this again quickly to obtain LINK tokens so that you are all set for the rest of this course.
Testnet LINK
In addition to native tokens, we will also need to obtain some testnet LINK. LINK is the token used by Chainlink to pay the service providers when you are using the Chainlink services.
Let's walk through how to get some testnet LINK, how to add LINK to MetaMask and how to send your tokens to another address (for example, if you wanted to fund a smart contract with LINK–spoiler alert, we will be doing this!)
Adding LINK to Metamask
-
Head to the Chainlink documentation and scroll down to the chain you want to use LINK on. E.g. Sepolia Testnet
-
Click the Add to wallet button to import the LINK token to NetaMask. Note that this will only add the token for that specific network. This will need to be repeated for all networks you intend to use LINK tokens.

Click Add token to add the token to your MetaMask

Using a LINK faucet
To obtain testnet LINK, head to the Chainlink Faucet page. Here, you will find a list of all supported networks.
Click the Link button at the top right, select the network(s) you want to get LINK on and click **Continue. "

Click Get tokens and click Confirm in MetaMask to sign the transaction.
Once the transaction has confirmed, you can see the LINK balance in your wallet.


Adding a token to MetaMask
LINK was easy to add to MetaMask since Chainlink included that cheeky Add to wallet button. But how do we add other tokens, such as USDC to MetaMask?
-
Find the token address. For USDC, for example, we can head to the Circle documentation to find the address of the USDC contract on different chains. Copy the address for the USDC token on the chain you are working on.
-
Open MetaMask and check you are on the same chain as the token address you just copied by clicking on the network button on the top left corner in MetMask

Click the Tokens tab, click the vertical three dots button, and then Import tokens

-
Enter the token contract address. MetaMask will automatically detect your token and its related information if it follows the ERC-20 standard.
-
Check the correct information (Address, Token Symbol, and Decimals).

Click Next to confirm the information. Click Import to import your token to MetaMask. This lets you view your balance and send tokens to others using the MetaMask UI.
Sending tokens to another address
To send tokens to another address:
Click on the Tokens tab, then click the token you want to send (you need to have imported it already), e.g., the LINK token.

Click the Send button.

Paste the address you want to send the tokens to.

Enter the amount and then click Next

To sign the transaction, click Confirm. This transaction will now be sent and the tokens will be transferred to the address you specified.

Testnet Funds
A practical guide to Testnet Funds - Learn how to obtain testnet LINK tokens using the Chainlink faucet and add various tokens like LINK and USDC to MetaMask. Master sending tokens between addresses on testnets like Sepolia.

Course Overview
About the course
What you'll learn
Smart contract and Solidity fundamentals
Chainlink’s decentralized oracle network (DON)
Chainlink Data Feeds
Chainlink Data Streams
Chainlink Automation
Chainlink CCIP
Chainlink Functions
Verifiable Random Function (VRF)
Chainlink Proof of Reserve
Course Description
Who is this course for?
- Smart Contract Developers
- Solutions Architects
- Blockchain Engineers
- Web3 Developers
- Security Researchers
Potential Careers
Smart Contract Engineer
$100,000 - $150,000 (avg. salary)
DeFi Developer
$75,000 - $200,000 (avg. salary)
Web3 developer
$60,000 - $150,000 (avg. salary)
Web3 Developer Relations
$85,000 - $125,000 (avg. salary)
Smart Contract Auditor
$100,000 - $200,000 (avg. salary)
Security researcher
$49,999 - $120,000 (avg. salary)
Blockchain Financial Analyst
$100,000 - $150,000 (avg. salary)


Last updated on July 25, 2025

Certification: Chainlink Fundamentals
The Chainlink Fundamentals proficiency exam covers is designed to confirm your grasp of all key concepts and learnings presented in the course material. Exam takers will have 75 minutes to complete 50 questions and must score 30/50 to pass and earn a Certificate of Completion. Because course material is continually updated, The Chainlink Fundamentals Certificate of Completions expires after 1 year. To remain current, holders must re-take the exam and pass to confirm their current knowledge.

Course Overview
About the course
What you'll learn
Smart contract and Solidity fundamentals
Chainlink’s decentralized oracle network (DON)
Chainlink Data Feeds
Chainlink Data Streams
Chainlink Automation
Chainlink CCIP
Chainlink Functions
Verifiable Random Function (VRF)
Chainlink Proof of Reserve
Course Description
Who is this course for?
- Smart Contract Developers
- Solutions Architects
- Blockchain Engineers
- Web3 Developers
- Security Researchers
Potential Careers
Smart Contract Engineer
$100,000 - $150,000 (avg. salary)
DeFi Developer
$75,000 - $200,000 (avg. salary)
Web3 developer
$60,000 - $150,000 (avg. salary)
Web3 Developer Relations
$85,000 - $125,000 (avg. salary)
Smart Contract Auditor
$100,000 - $200,000 (avg. salary)
Security researcher
$49,999 - $120,000 (avg. salary)
Blockchain Financial Analyst
$100,000 - $150,000 (avg. salary)
Last updated on July 25, 2025